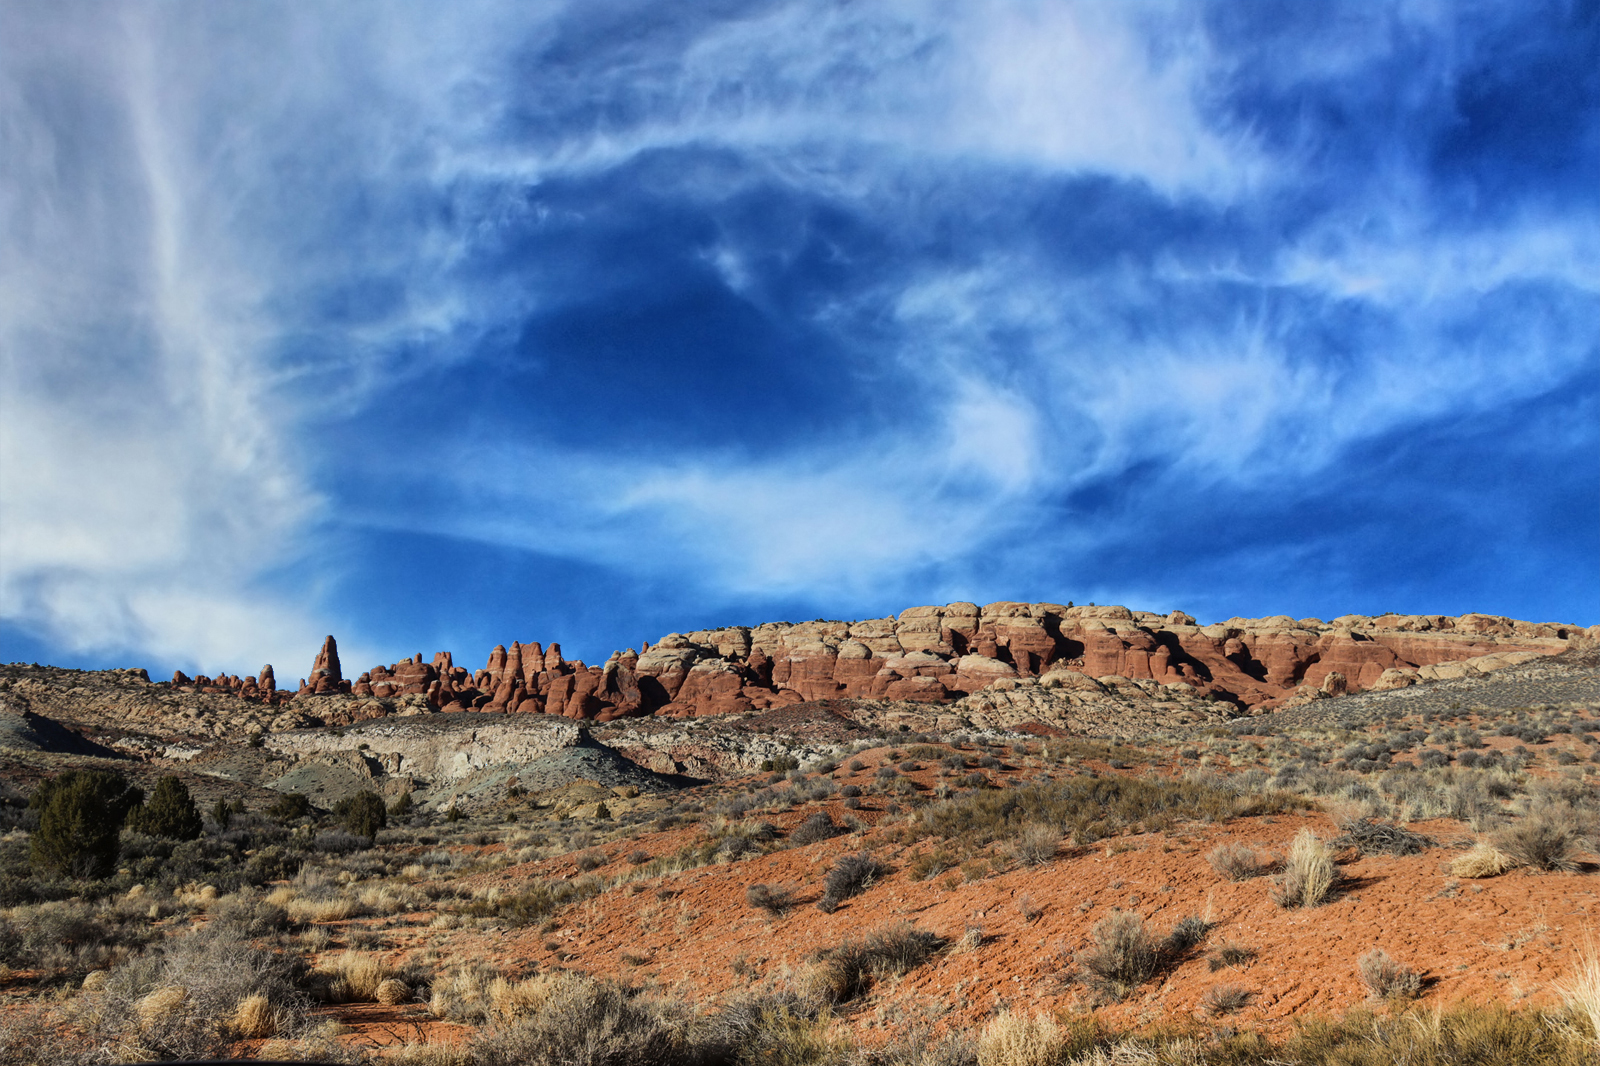
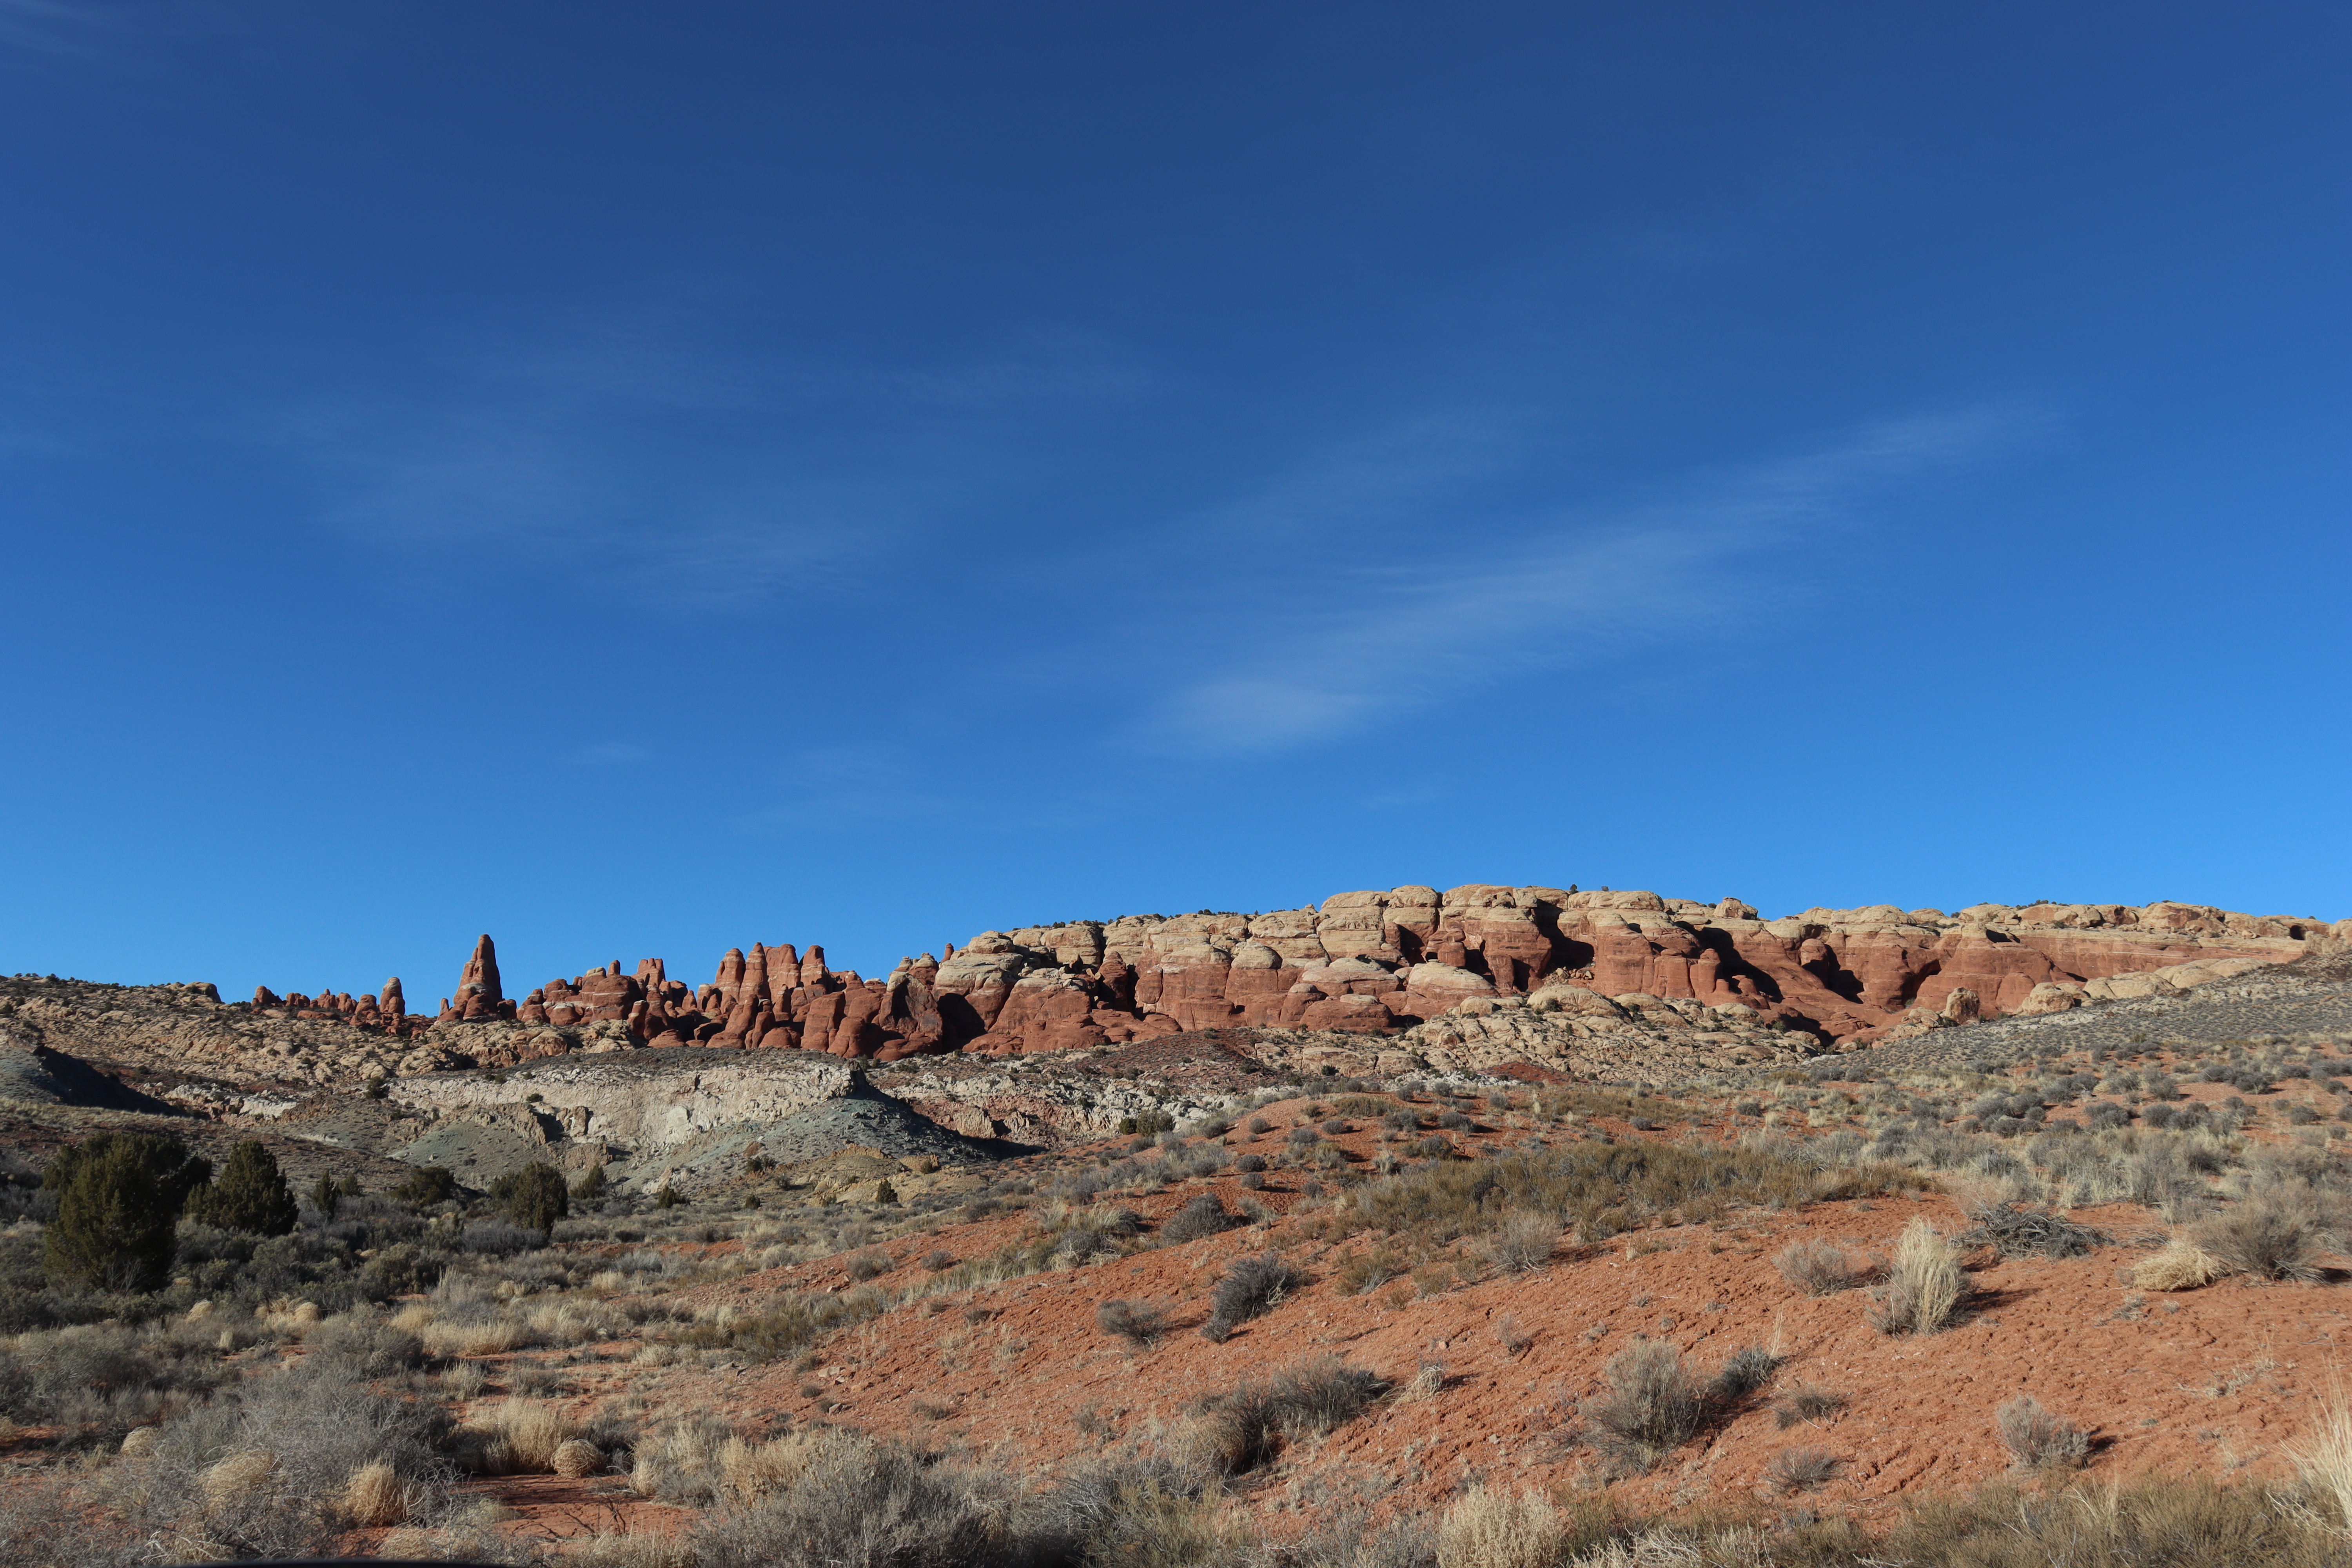
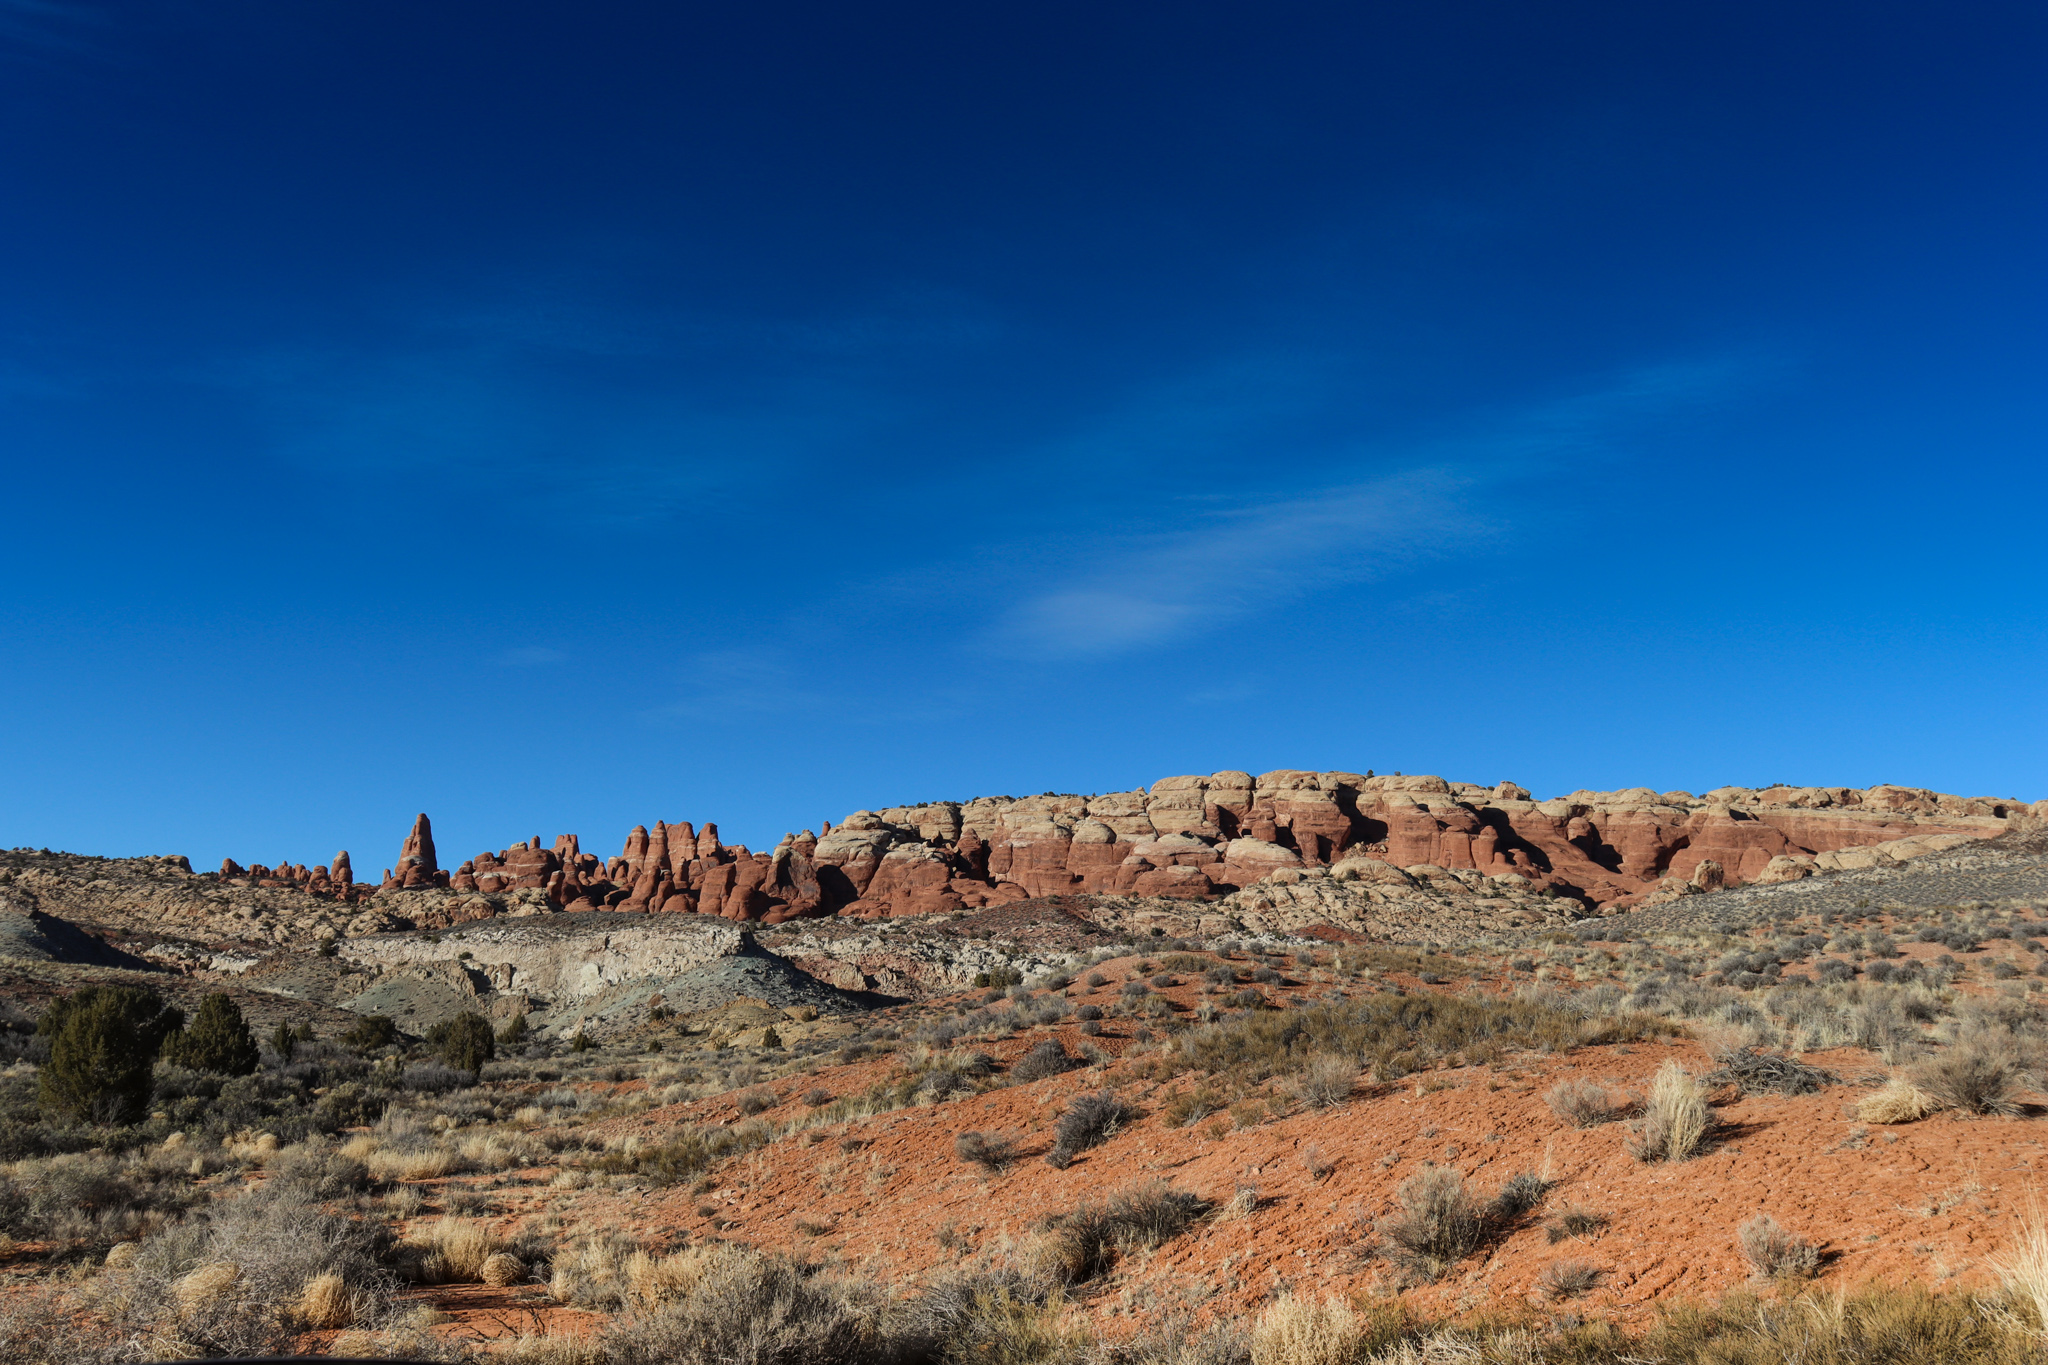
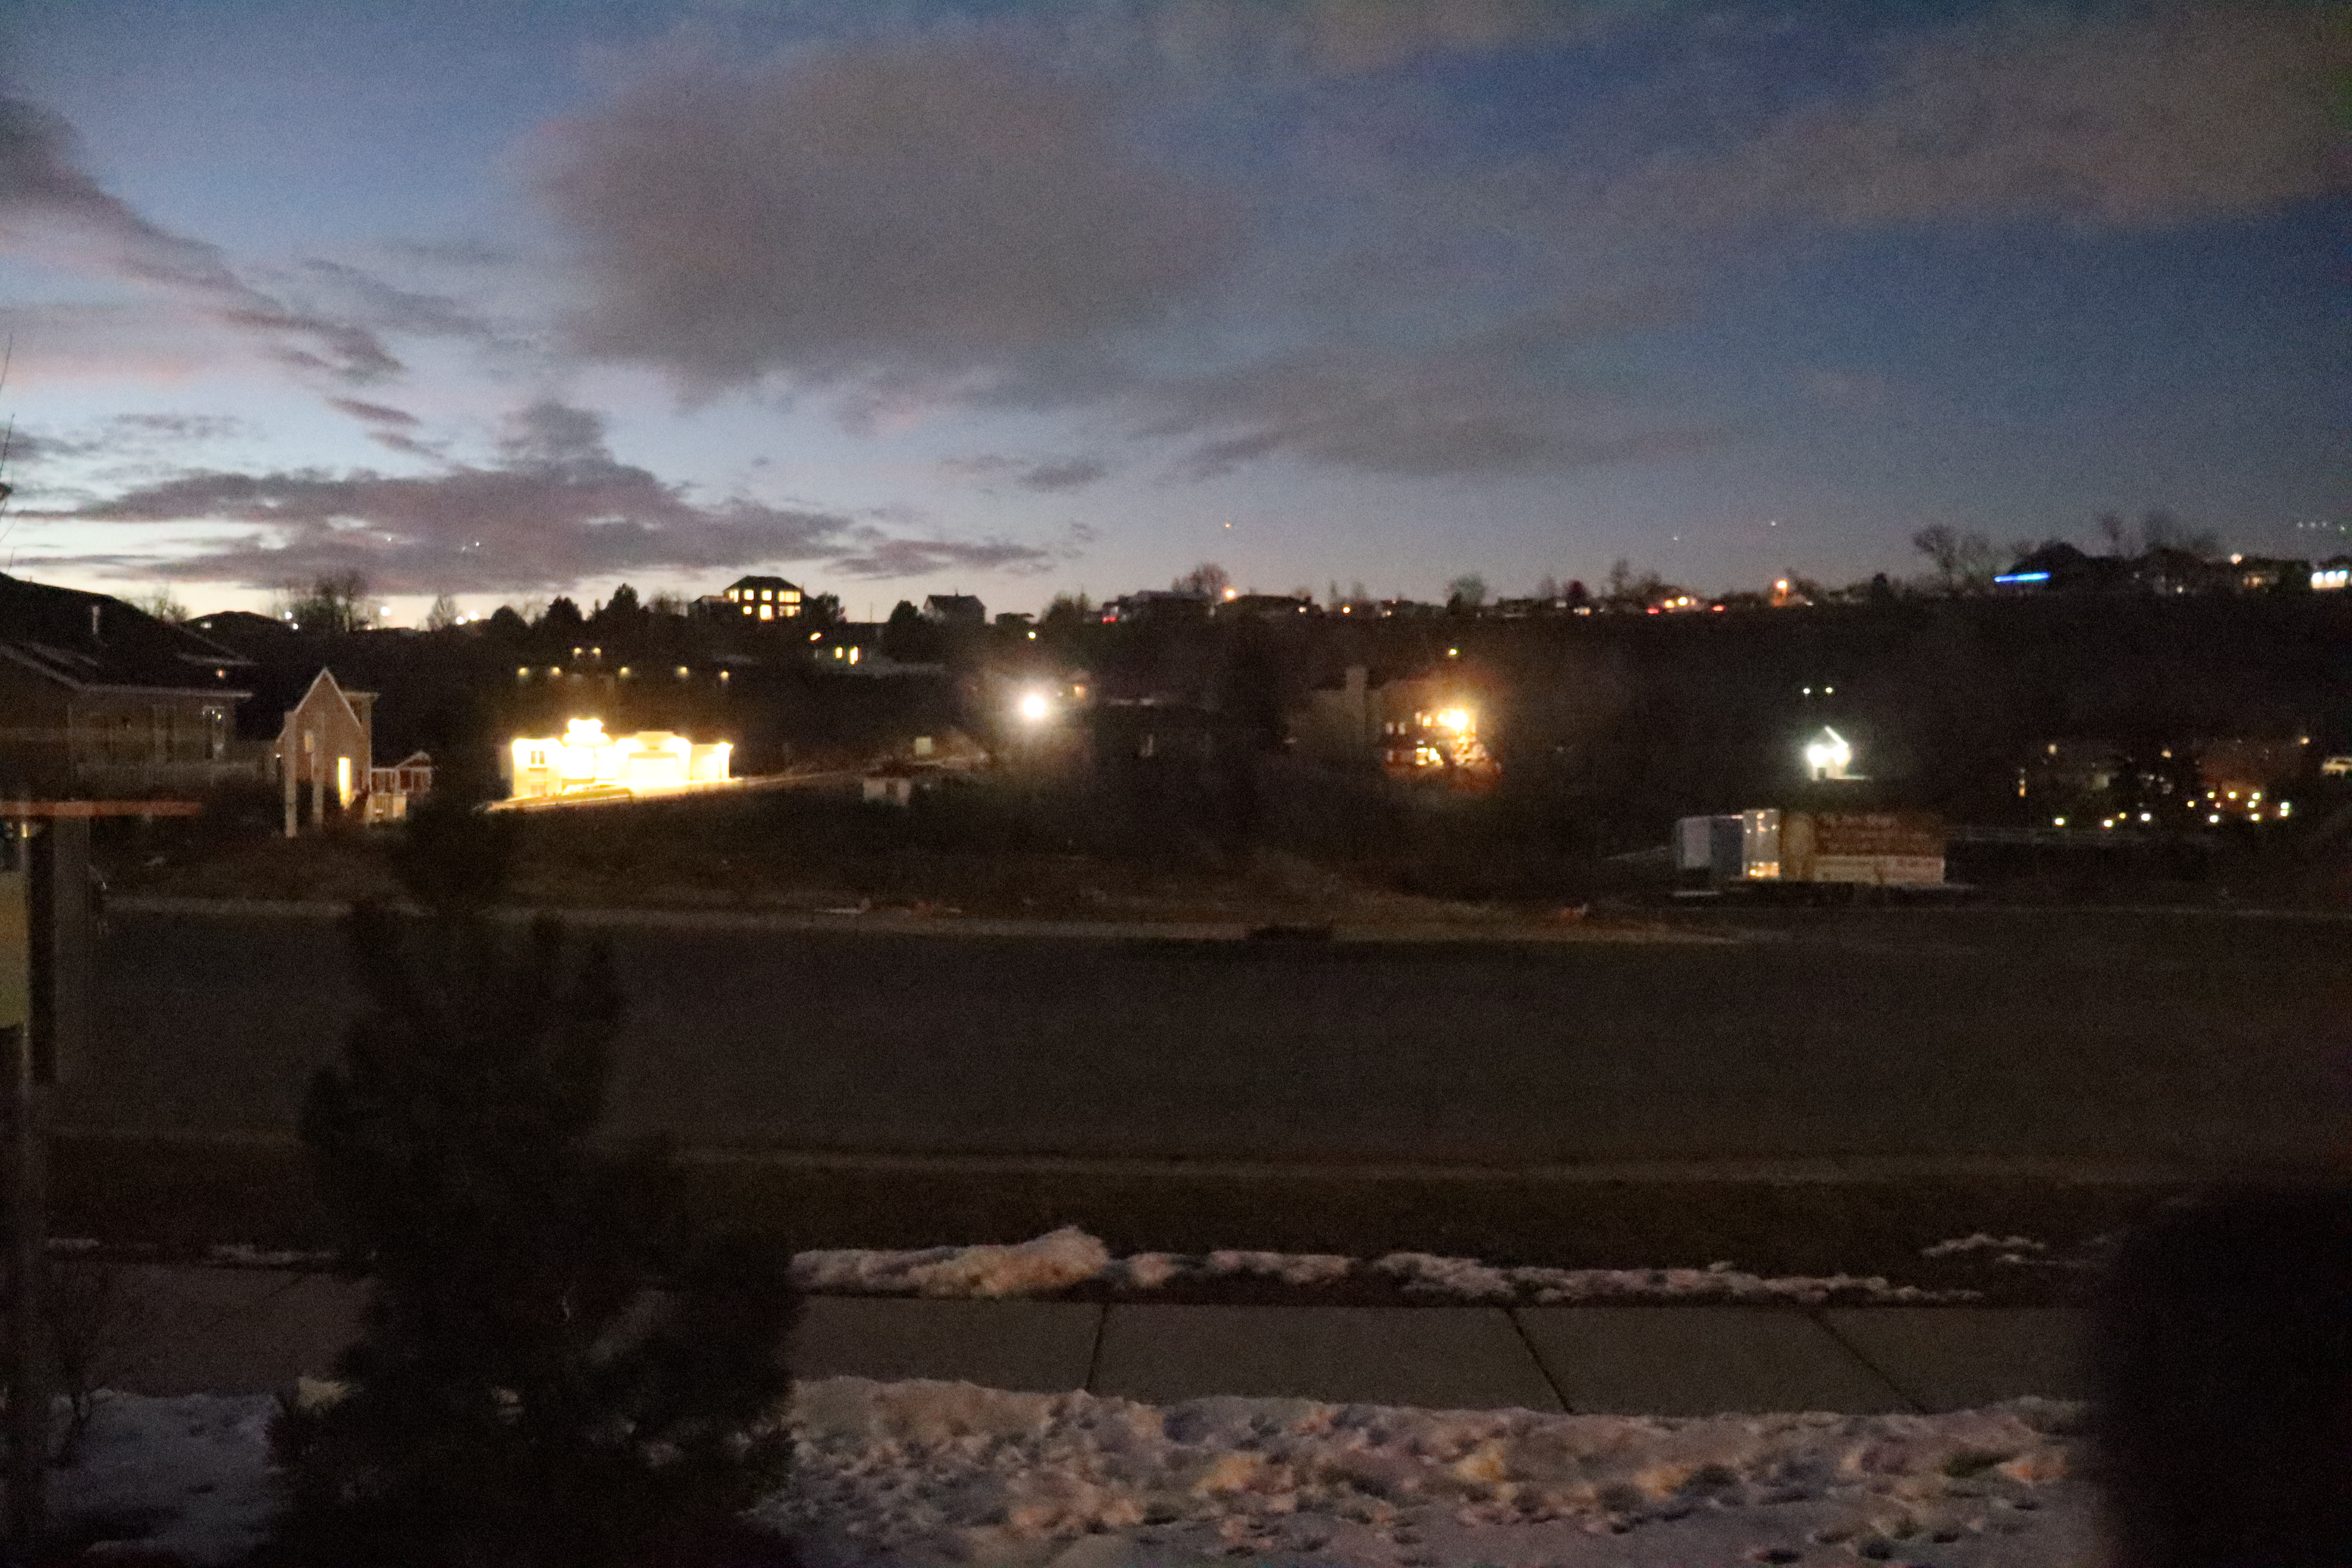
The first edit shown above was a simple process for sky replacement. I placed an image of the sky I wanted behind my original photo and changed the sky’s blending mode to multiply. Then I used a mixture of Blend If and layer masks and brush tools to remove the original sky with decent feathering so as not to leave a harsh line between the two photos.
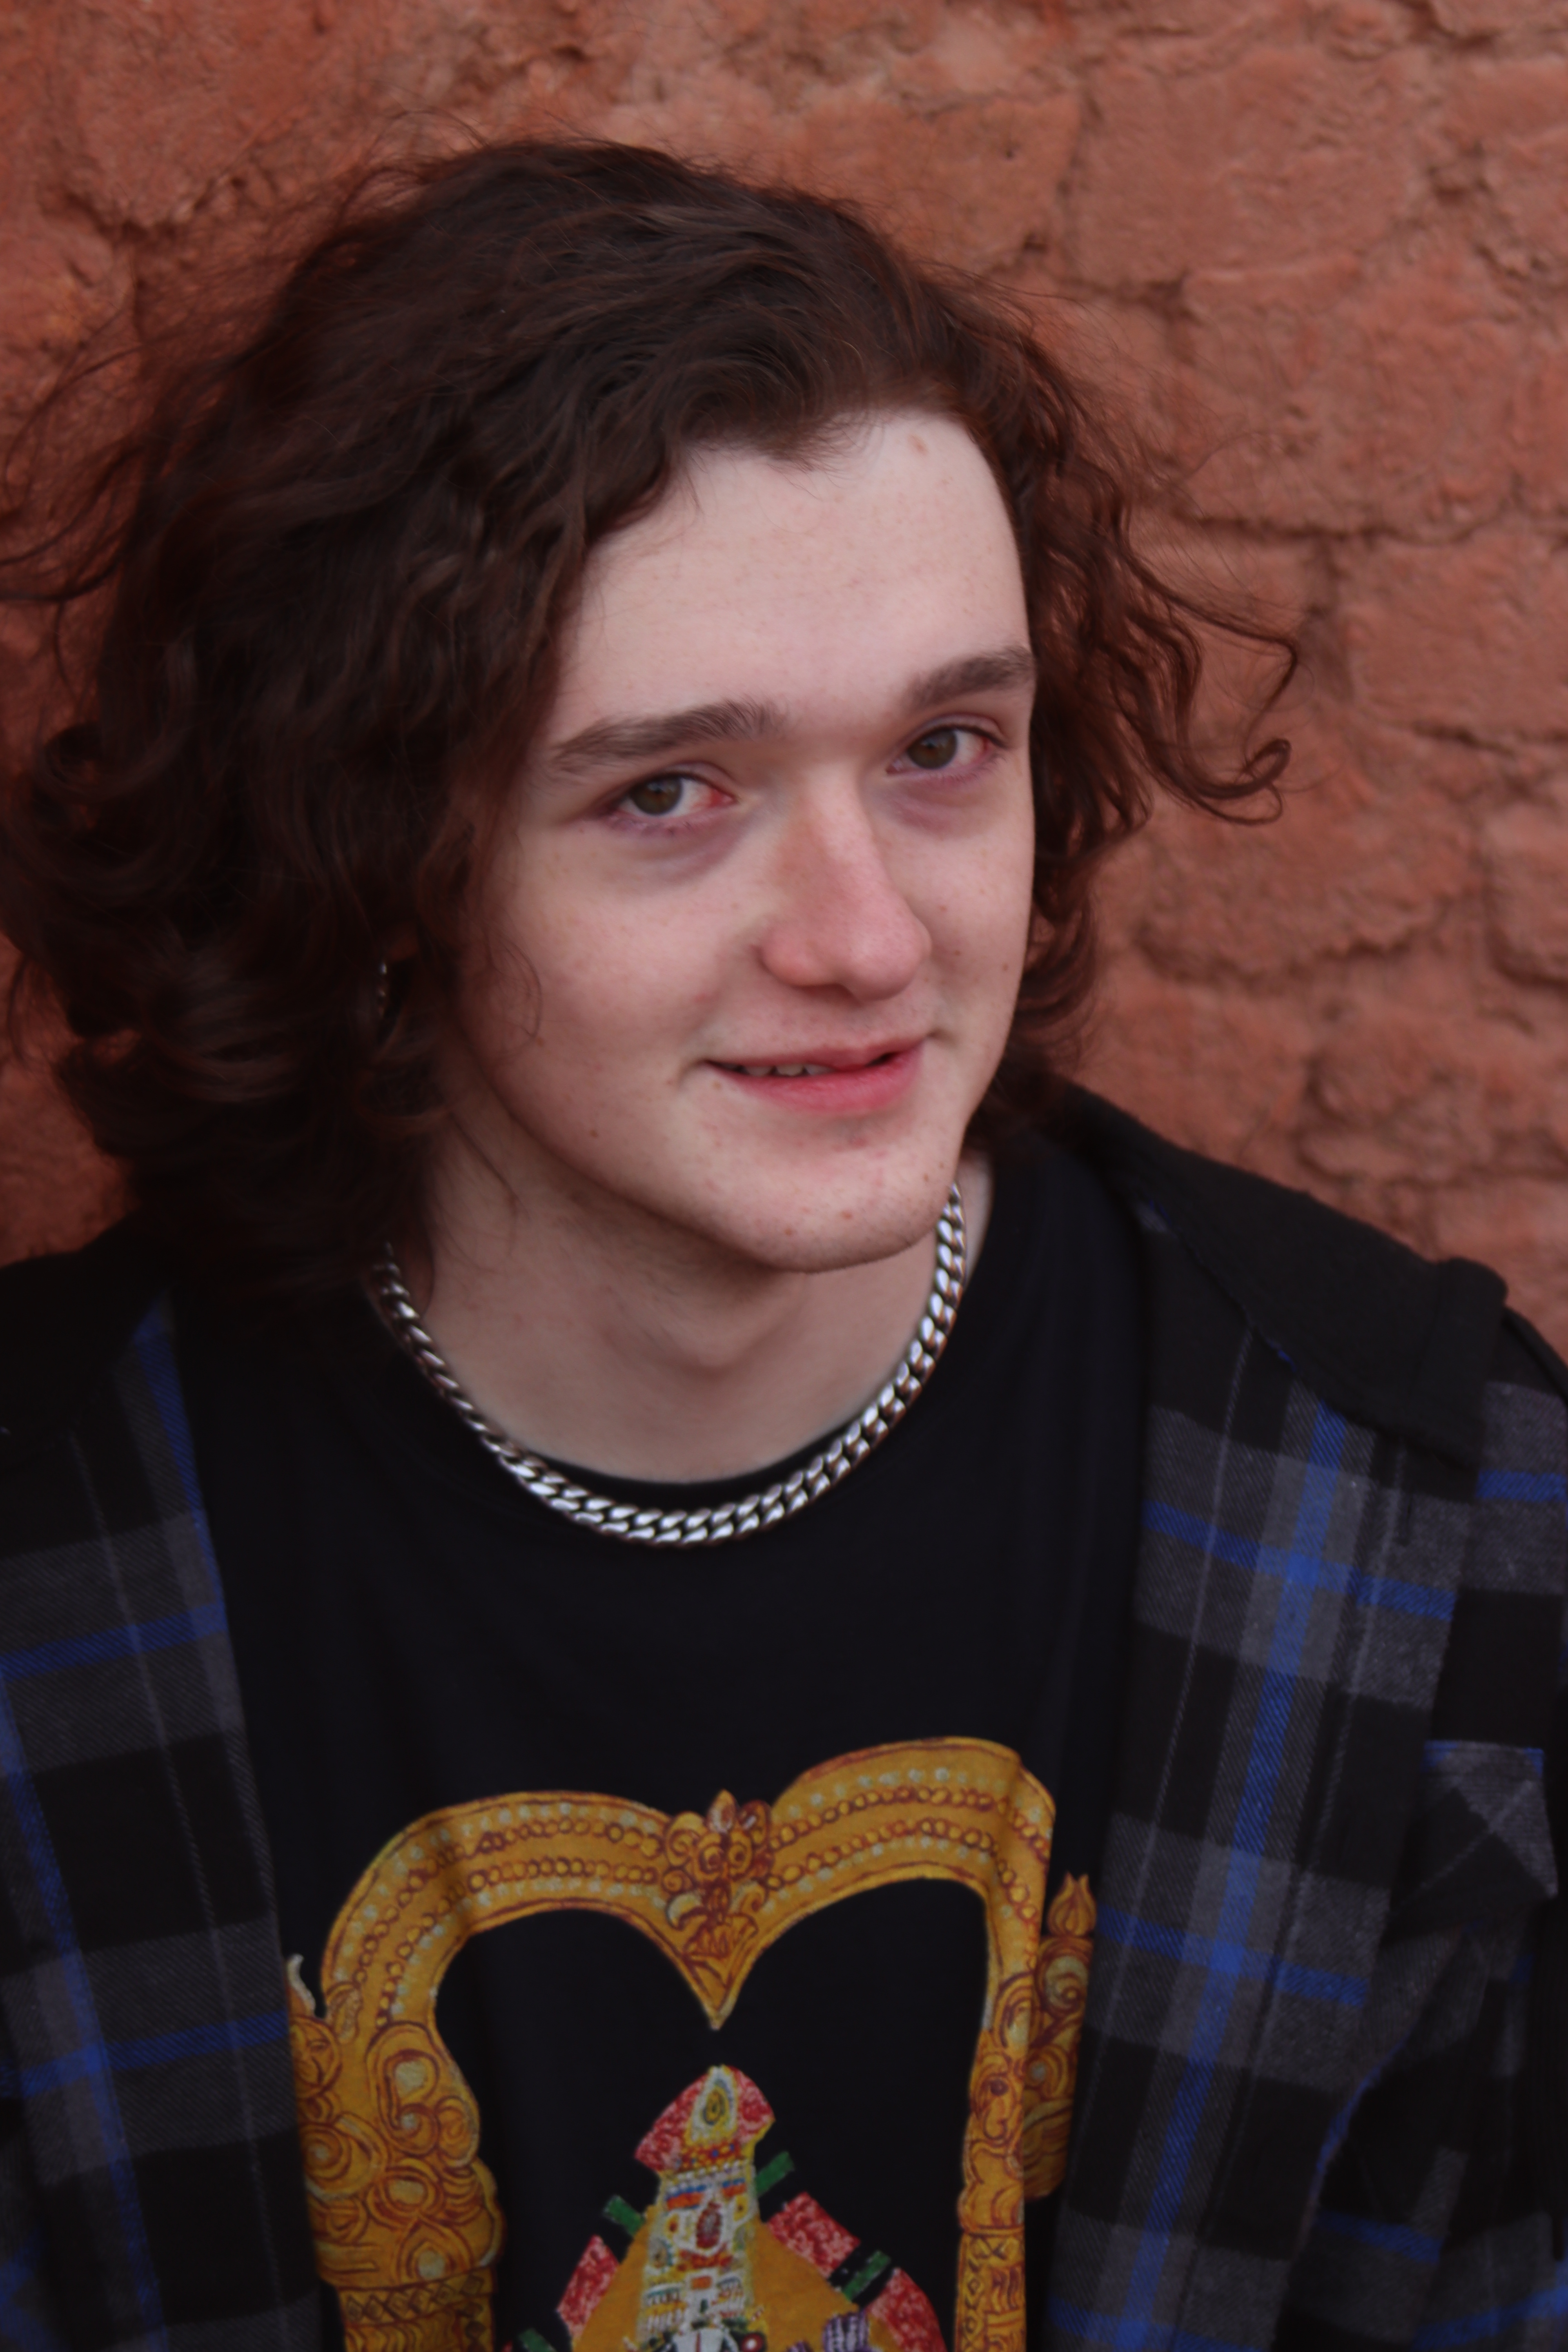
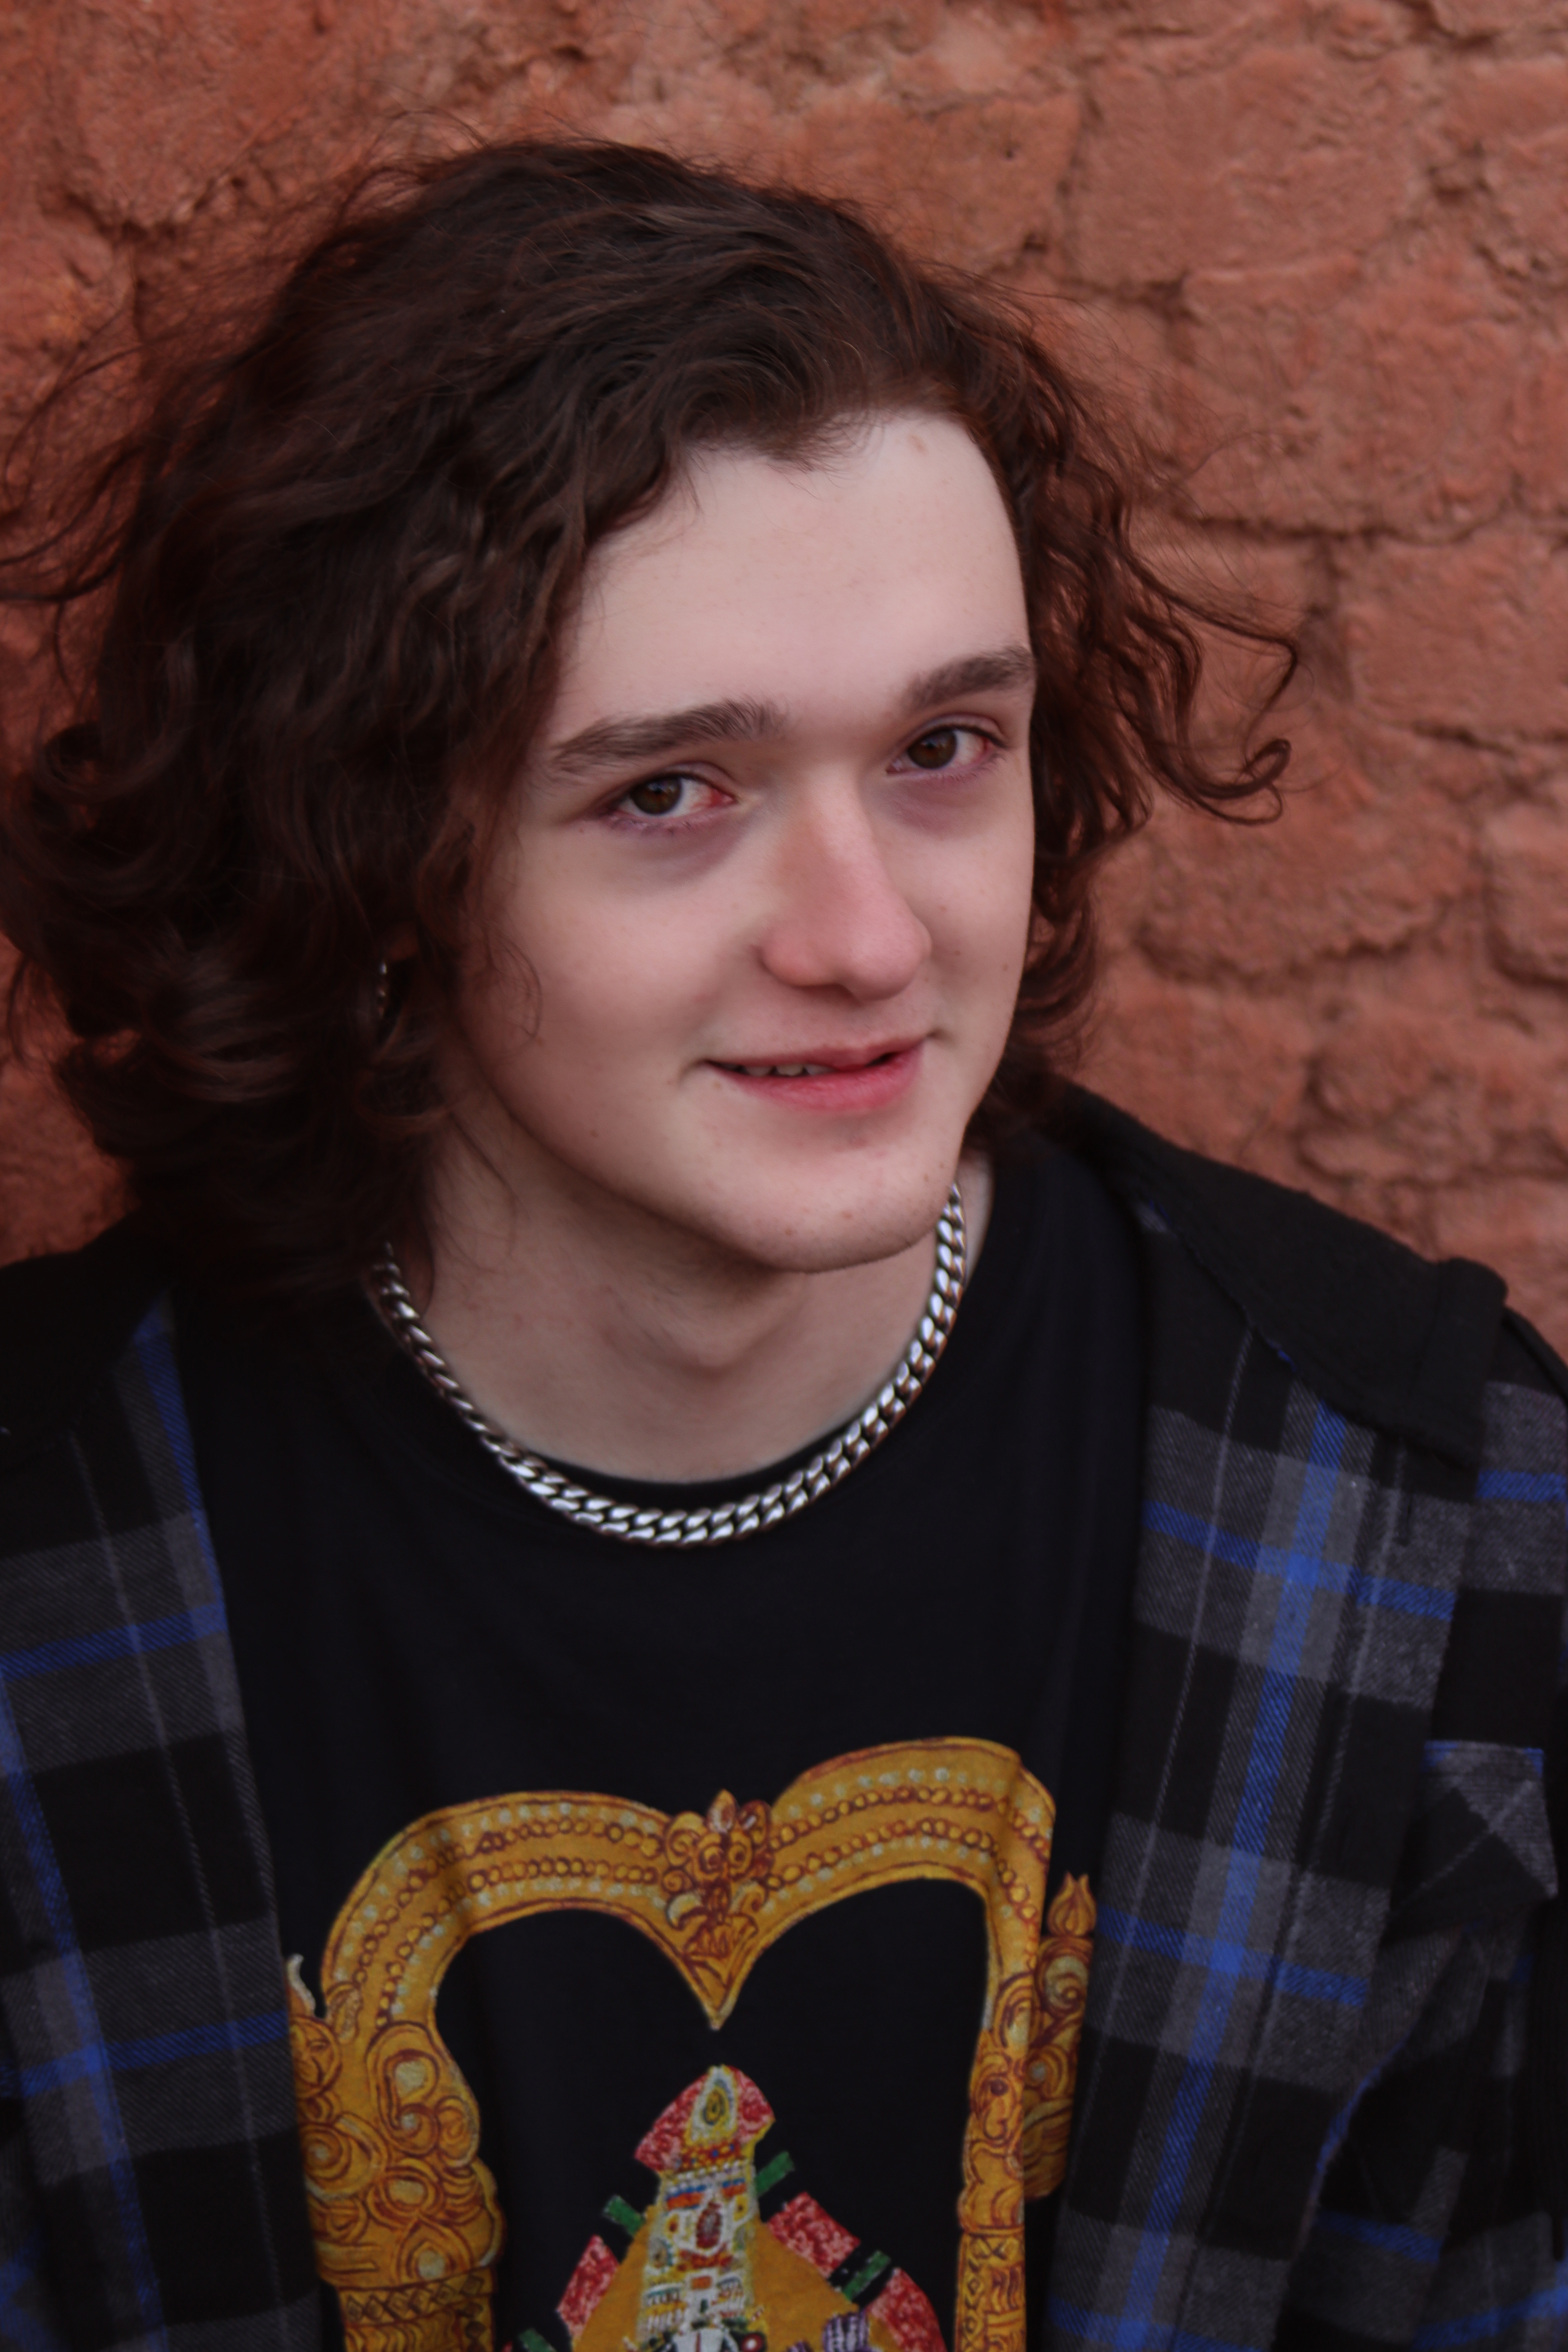
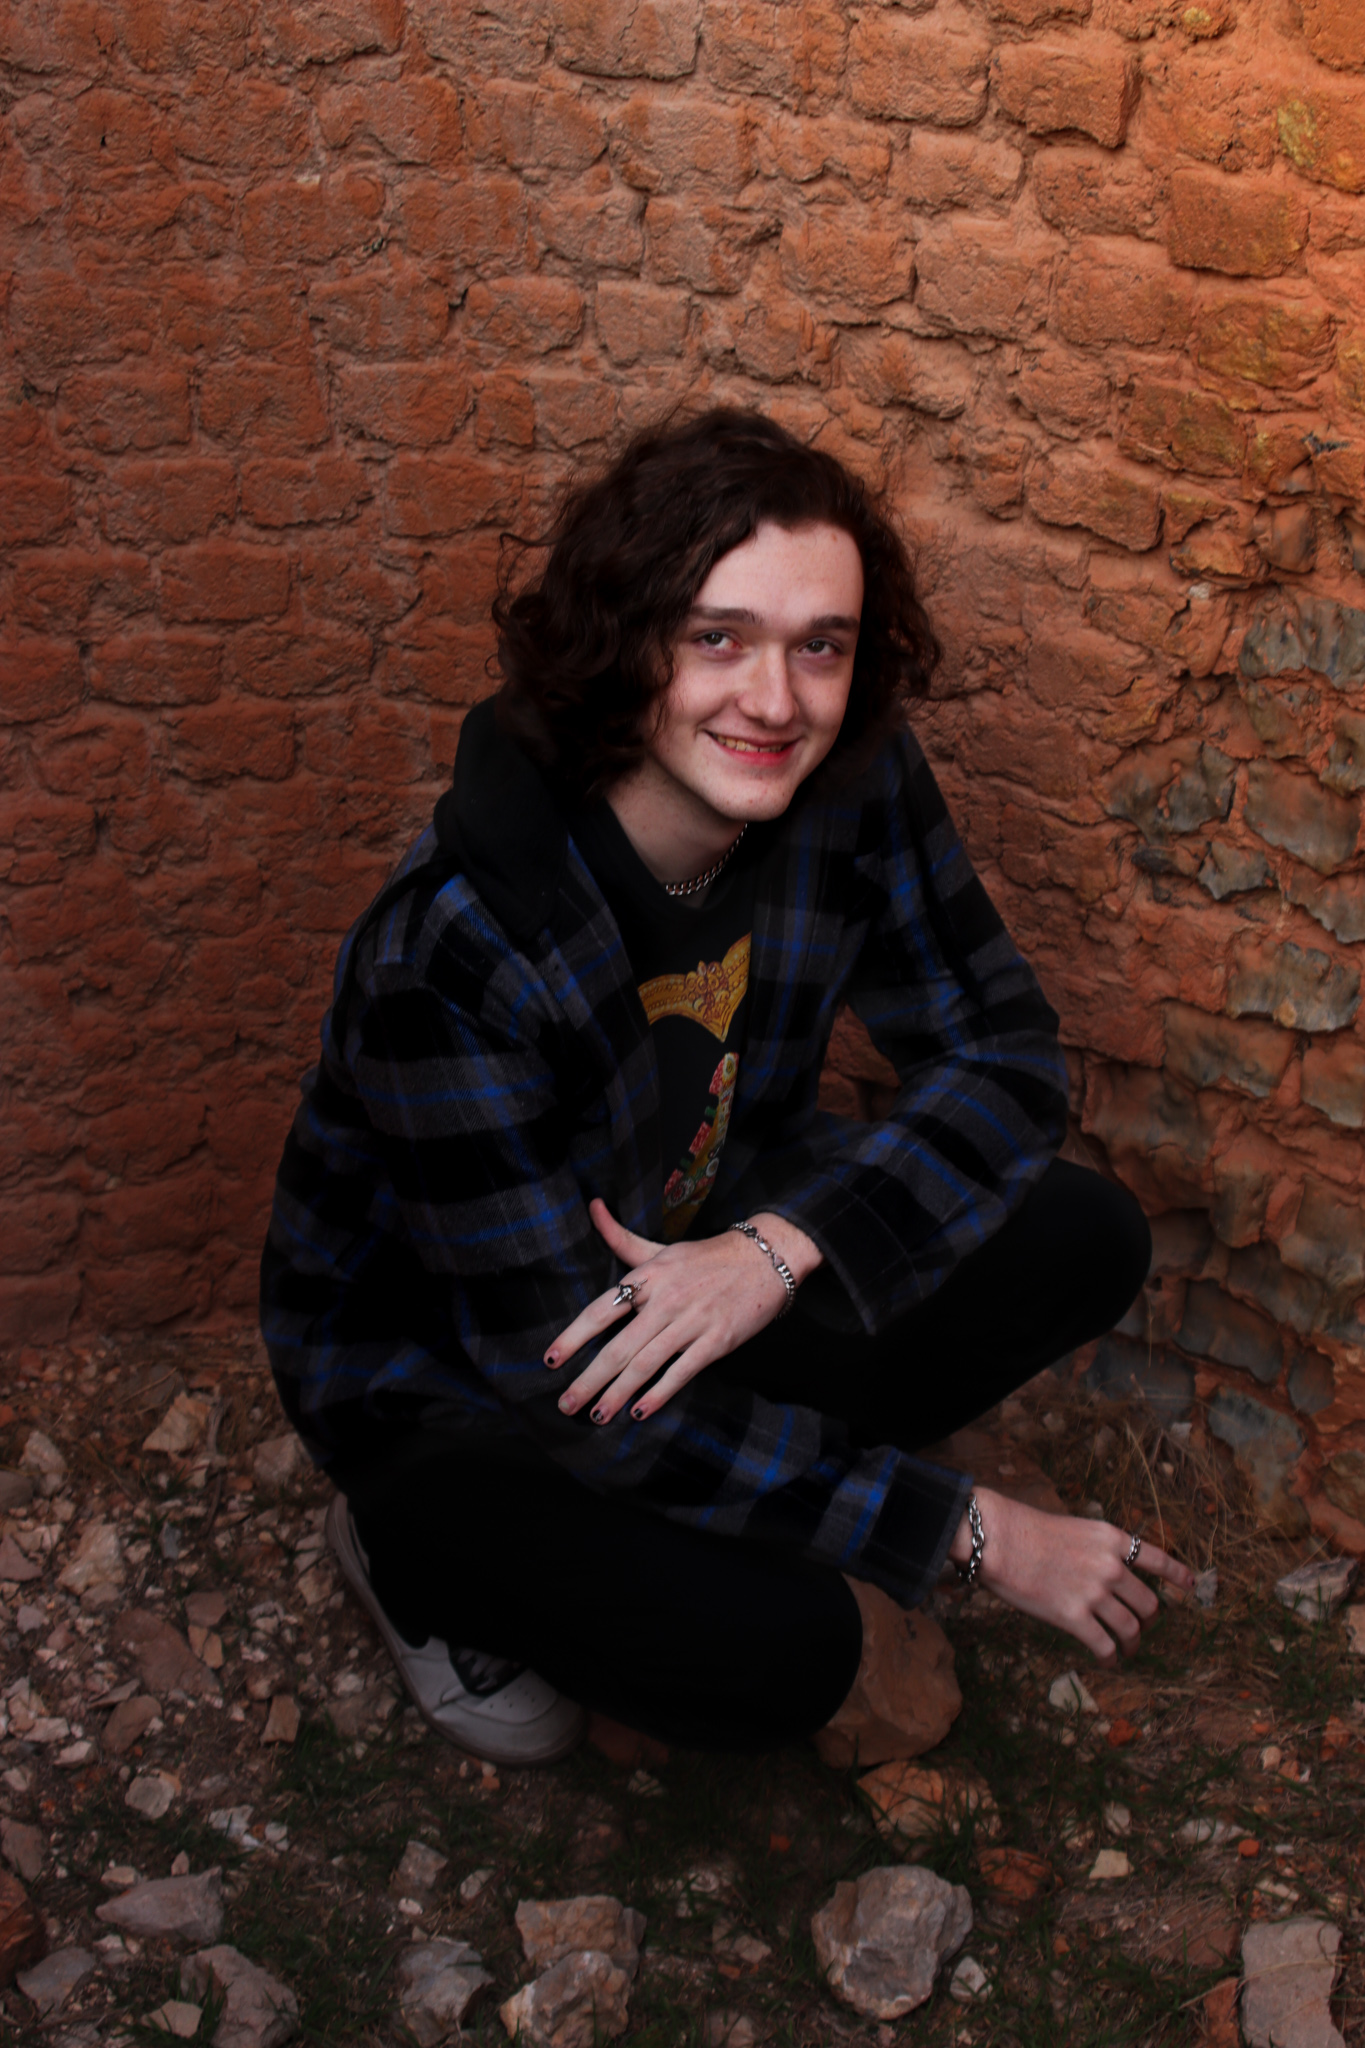
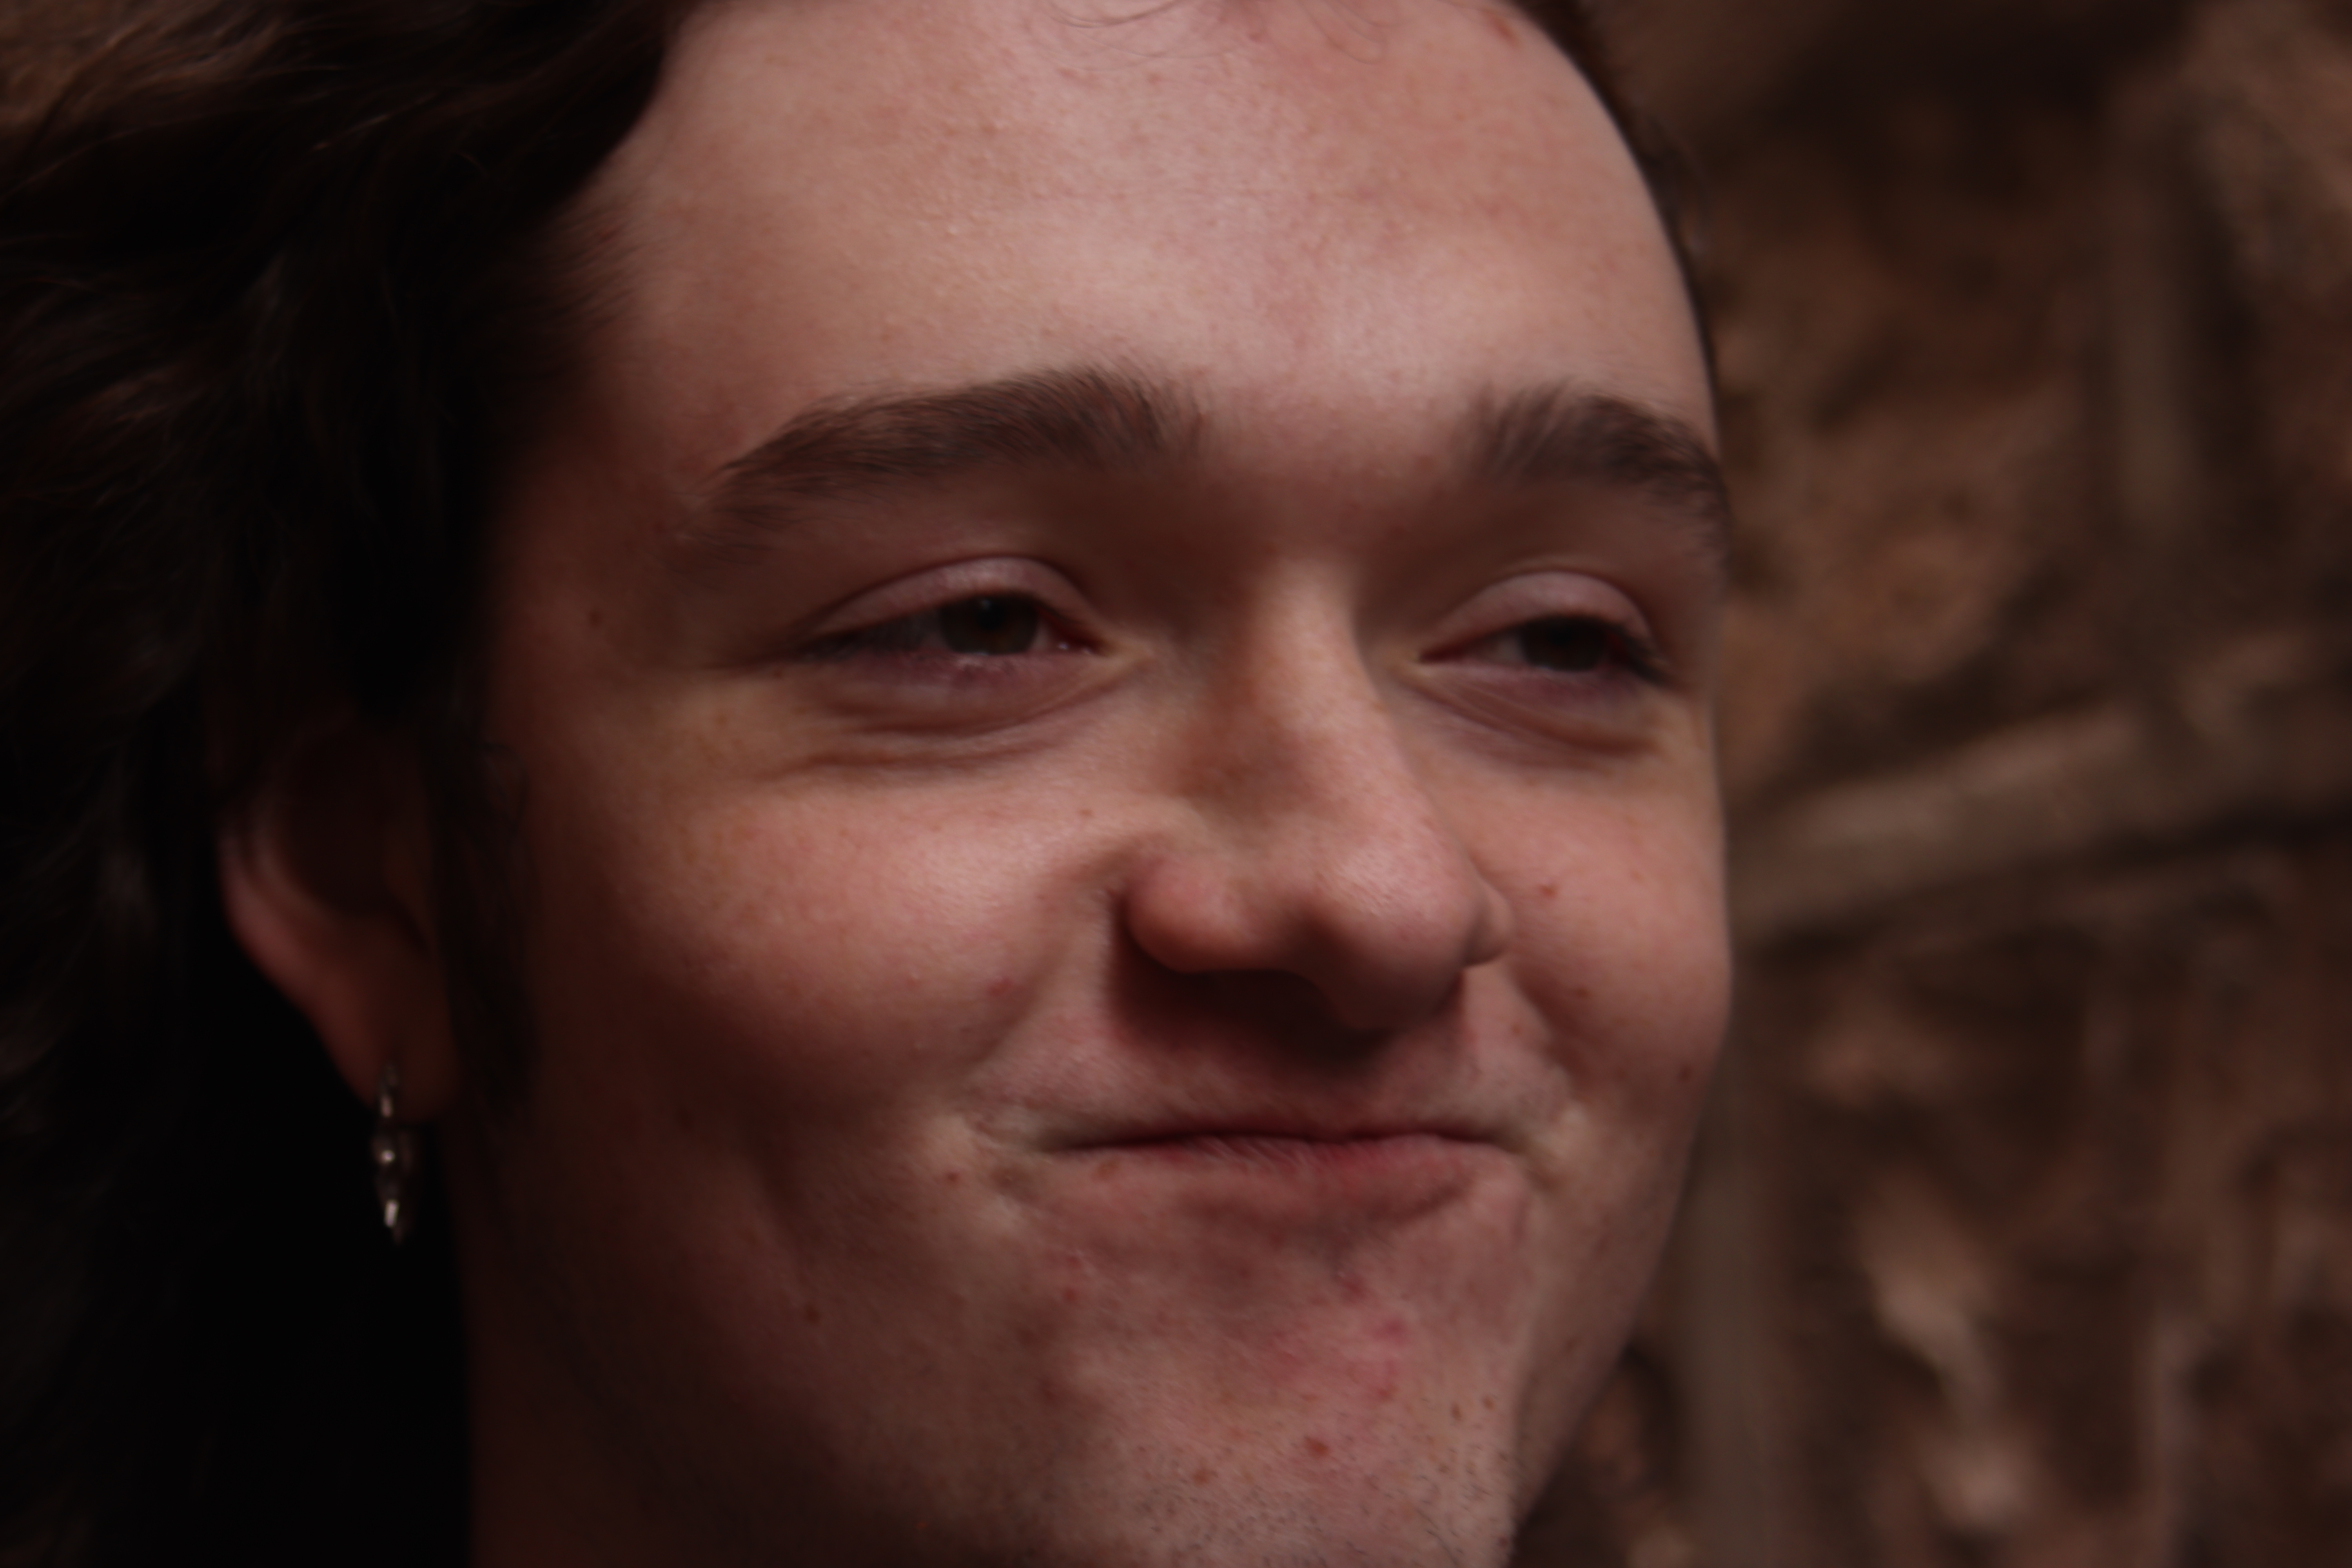
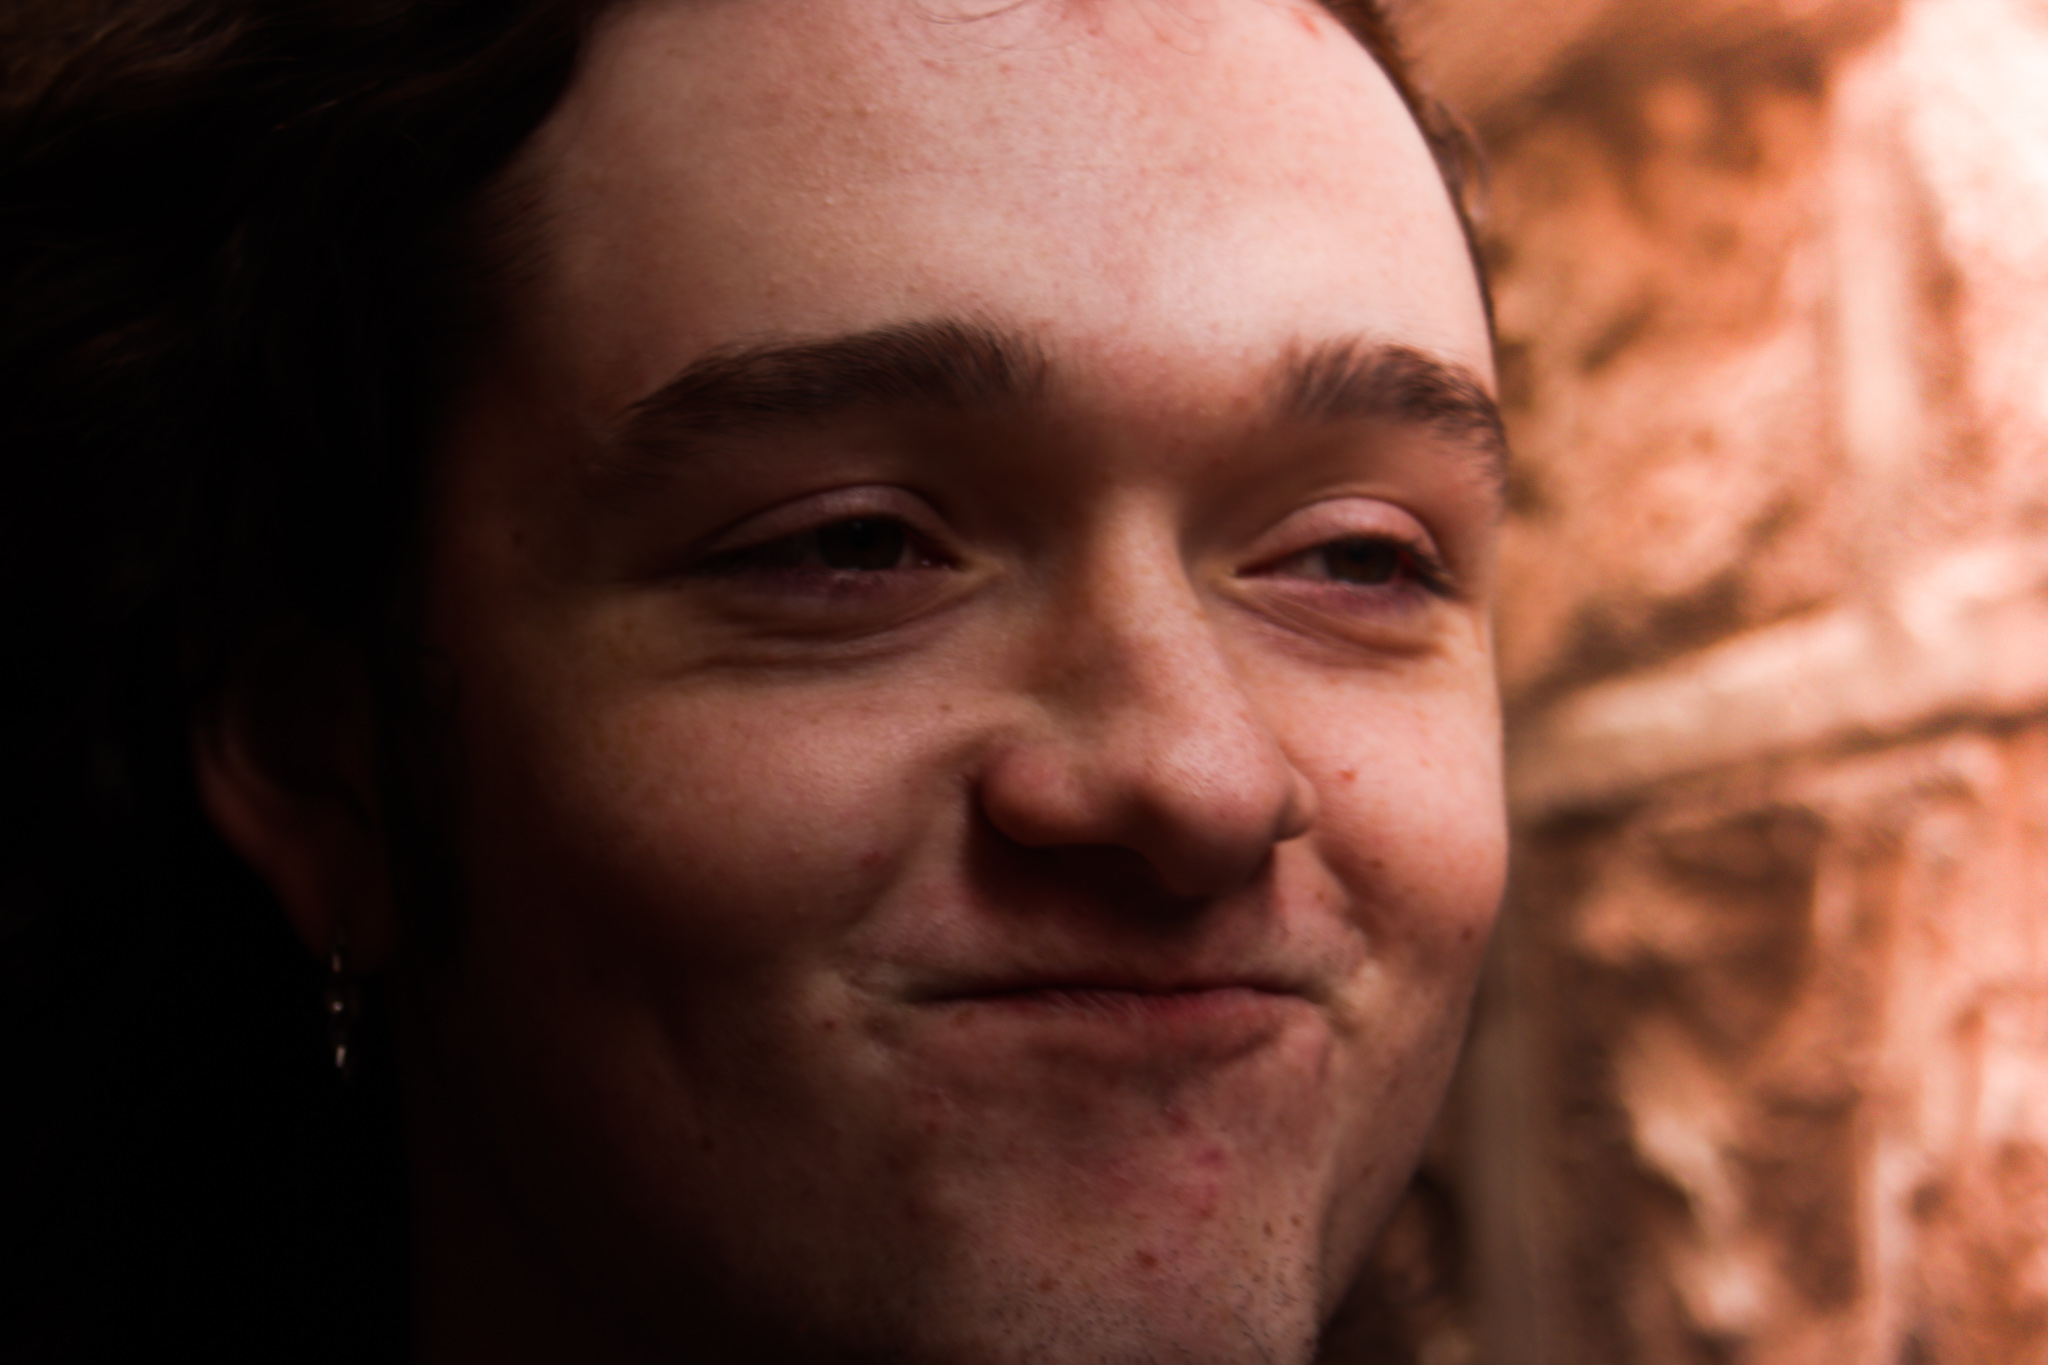
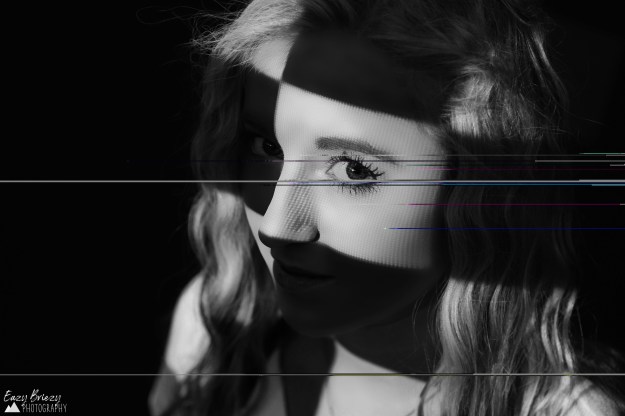
For this next photo, I smoothed out the skin and made the color of the eyes pop out more. First I made my photo into a smart filtered photo. For the skin, I created two copies of the photo in layers and grouped them, then added blur filters to the first layer, then changed my blending mode to linear light and added a high pass filter in the second layer. I created a layer mask on the group layer and used a channel filter to brush over the skin of the subject. For the eyes, I created an empty group layer, masked it, and used the channel filter to make only the iris and pupil of the eyes visible. I then added a brightness/contrast and hue/saturation adjustment layer, and drastically enhanced brightness, contrast, and saturation. for both skin and eyes, I brought the opacity of the layers down to around half their opacity, because the changes are meant to be subtle.
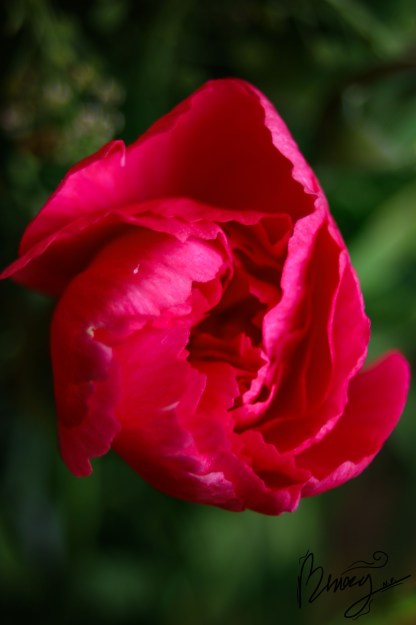
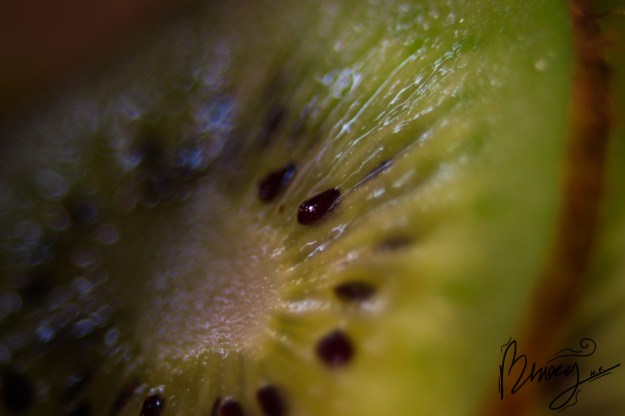
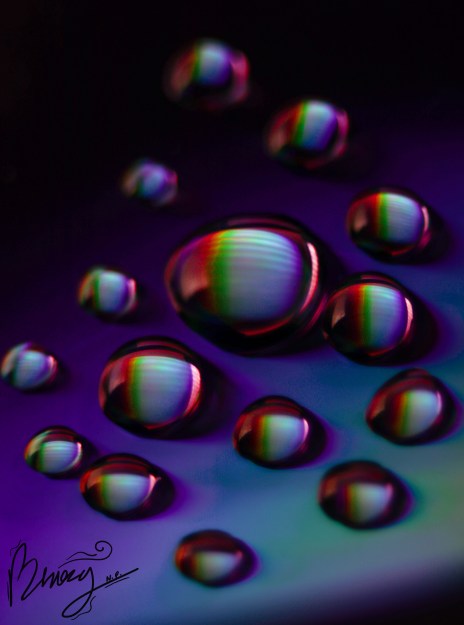
Macro photography is an extremely detailed closeup of the smaller things in the world. To do this you will need a macro lens extension. Exposure becomes difficult with this style because of the extreme zoom. It also requires a steady hand and some good timing. You typically want to put your focal adjustment in manual mode and move back and forth to find the right exposure. I take burst shots when I do this because it is difficult to stay in the same place long enough to take a photo.
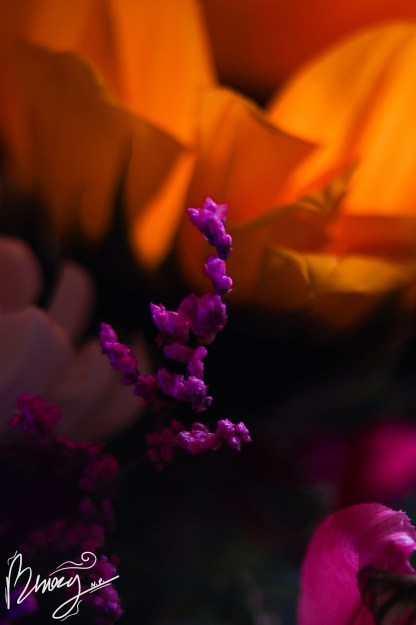
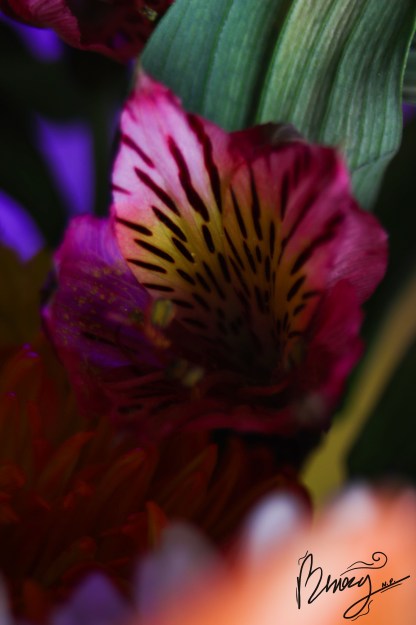
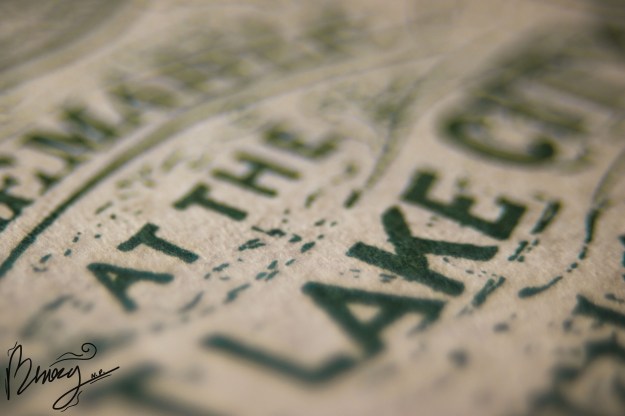
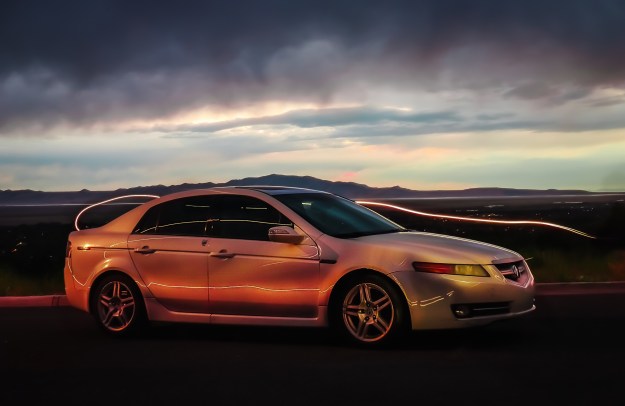
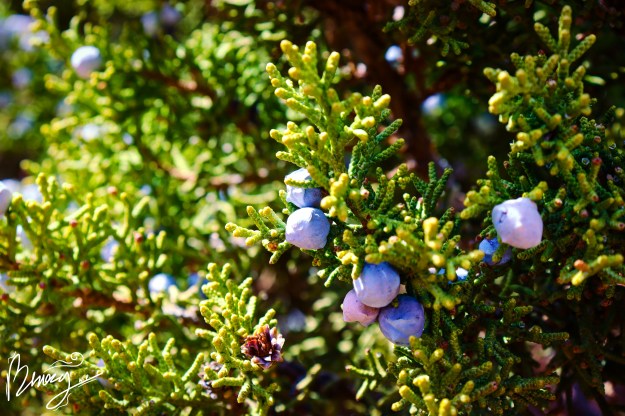
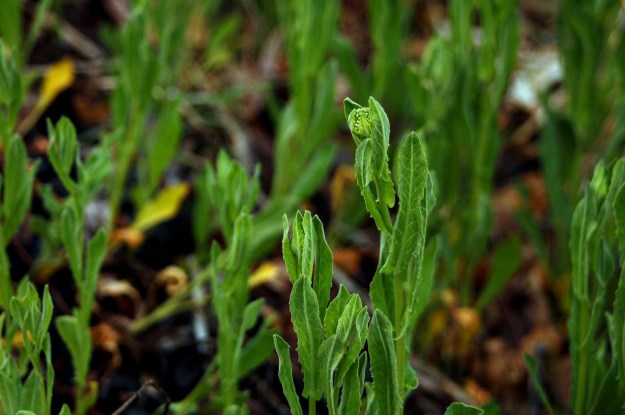
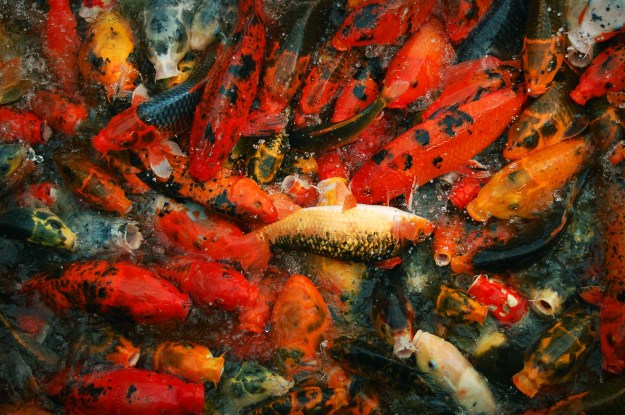
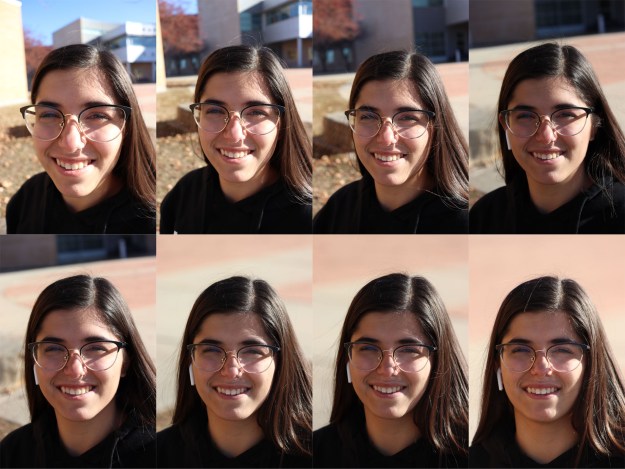
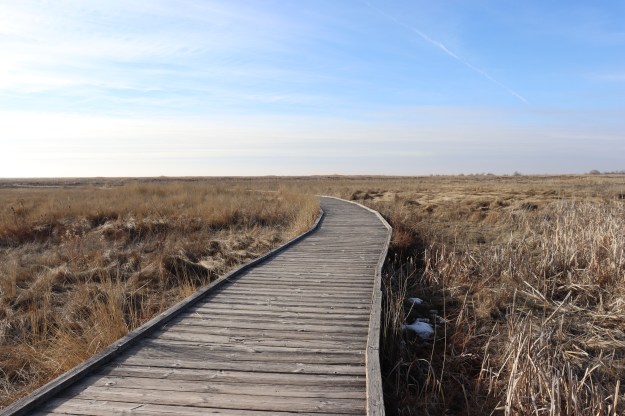
Lightroom is a good alternative to Photoshop if you need a quick edit. As an example, I have edited these photos using specific edits, and I have shown you the original photo as well. The first photo uses a combination of gradients, adjustment brushes, and slider edits. The second photo was edited using only adjustment brushes. The third was edited using two opposing gradients. The fourth was edited using slider edits. The fifth was a combination of slider edits and two opposing gradients.
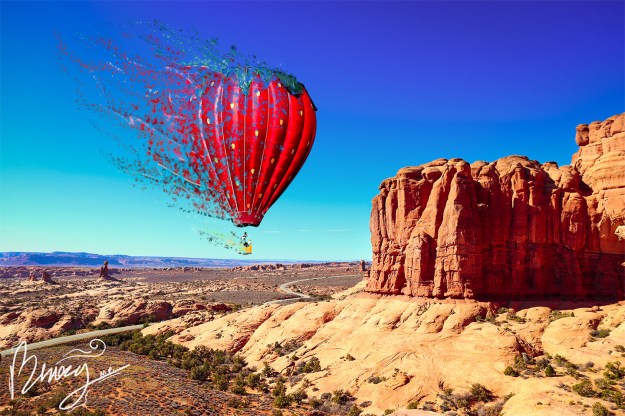
This is one of my favorite photo edits to make. To do this, you have to create two layers. In one, you remove the object you want to edit. In the second, you use the Liquify filter to warp the image in the direction you want it to go. You then create layer masks for both. Once you have done that, create a custom splatter brush in photoshop. In the first layer, use the splatter brush to make some of the inside of the object disappear, as well as the edges. In the other layer, you use the brush to bring out wisps of the warped image, creating an ashy effect.
On March 5th I entered these 4 photos into multiple contests for GuruShots (https://gurushots.com/challenges/my-challenges/current). They have multiple ongoing contests where all you have to do is upload a photo and vote on your favorite. It’s simple and interactive, and there are several categories to choose from at any given time.
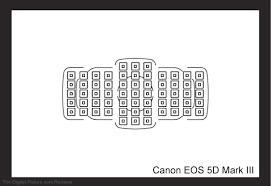
Autofocus points are the sensors that allow you to focus on a subject. You would see them as squares or rectangles in your lens that you use to focus. Autofocus looks for lines in your image and finds the thing your trying to focus on. Some points only focus or look for horizontal lines, some look for vertical lines. Some points (especially on more advanced cameras) have cross focus. They focus on both vertical and horizontal lines in their viewfinder. I have a Canon EOS Rebel SL3, which has nine AF points across the optical viewfinder. This includes a dual pixel CMOS AF system which allows me to focus on a precise area within the subject I’m photographing. All of my AF points are cross-focus. Most newer cameras will try to make as many of their AF points cross-focus as possible, though some older cameras will have horizontal or vertical, with the occasional cross-focus point.
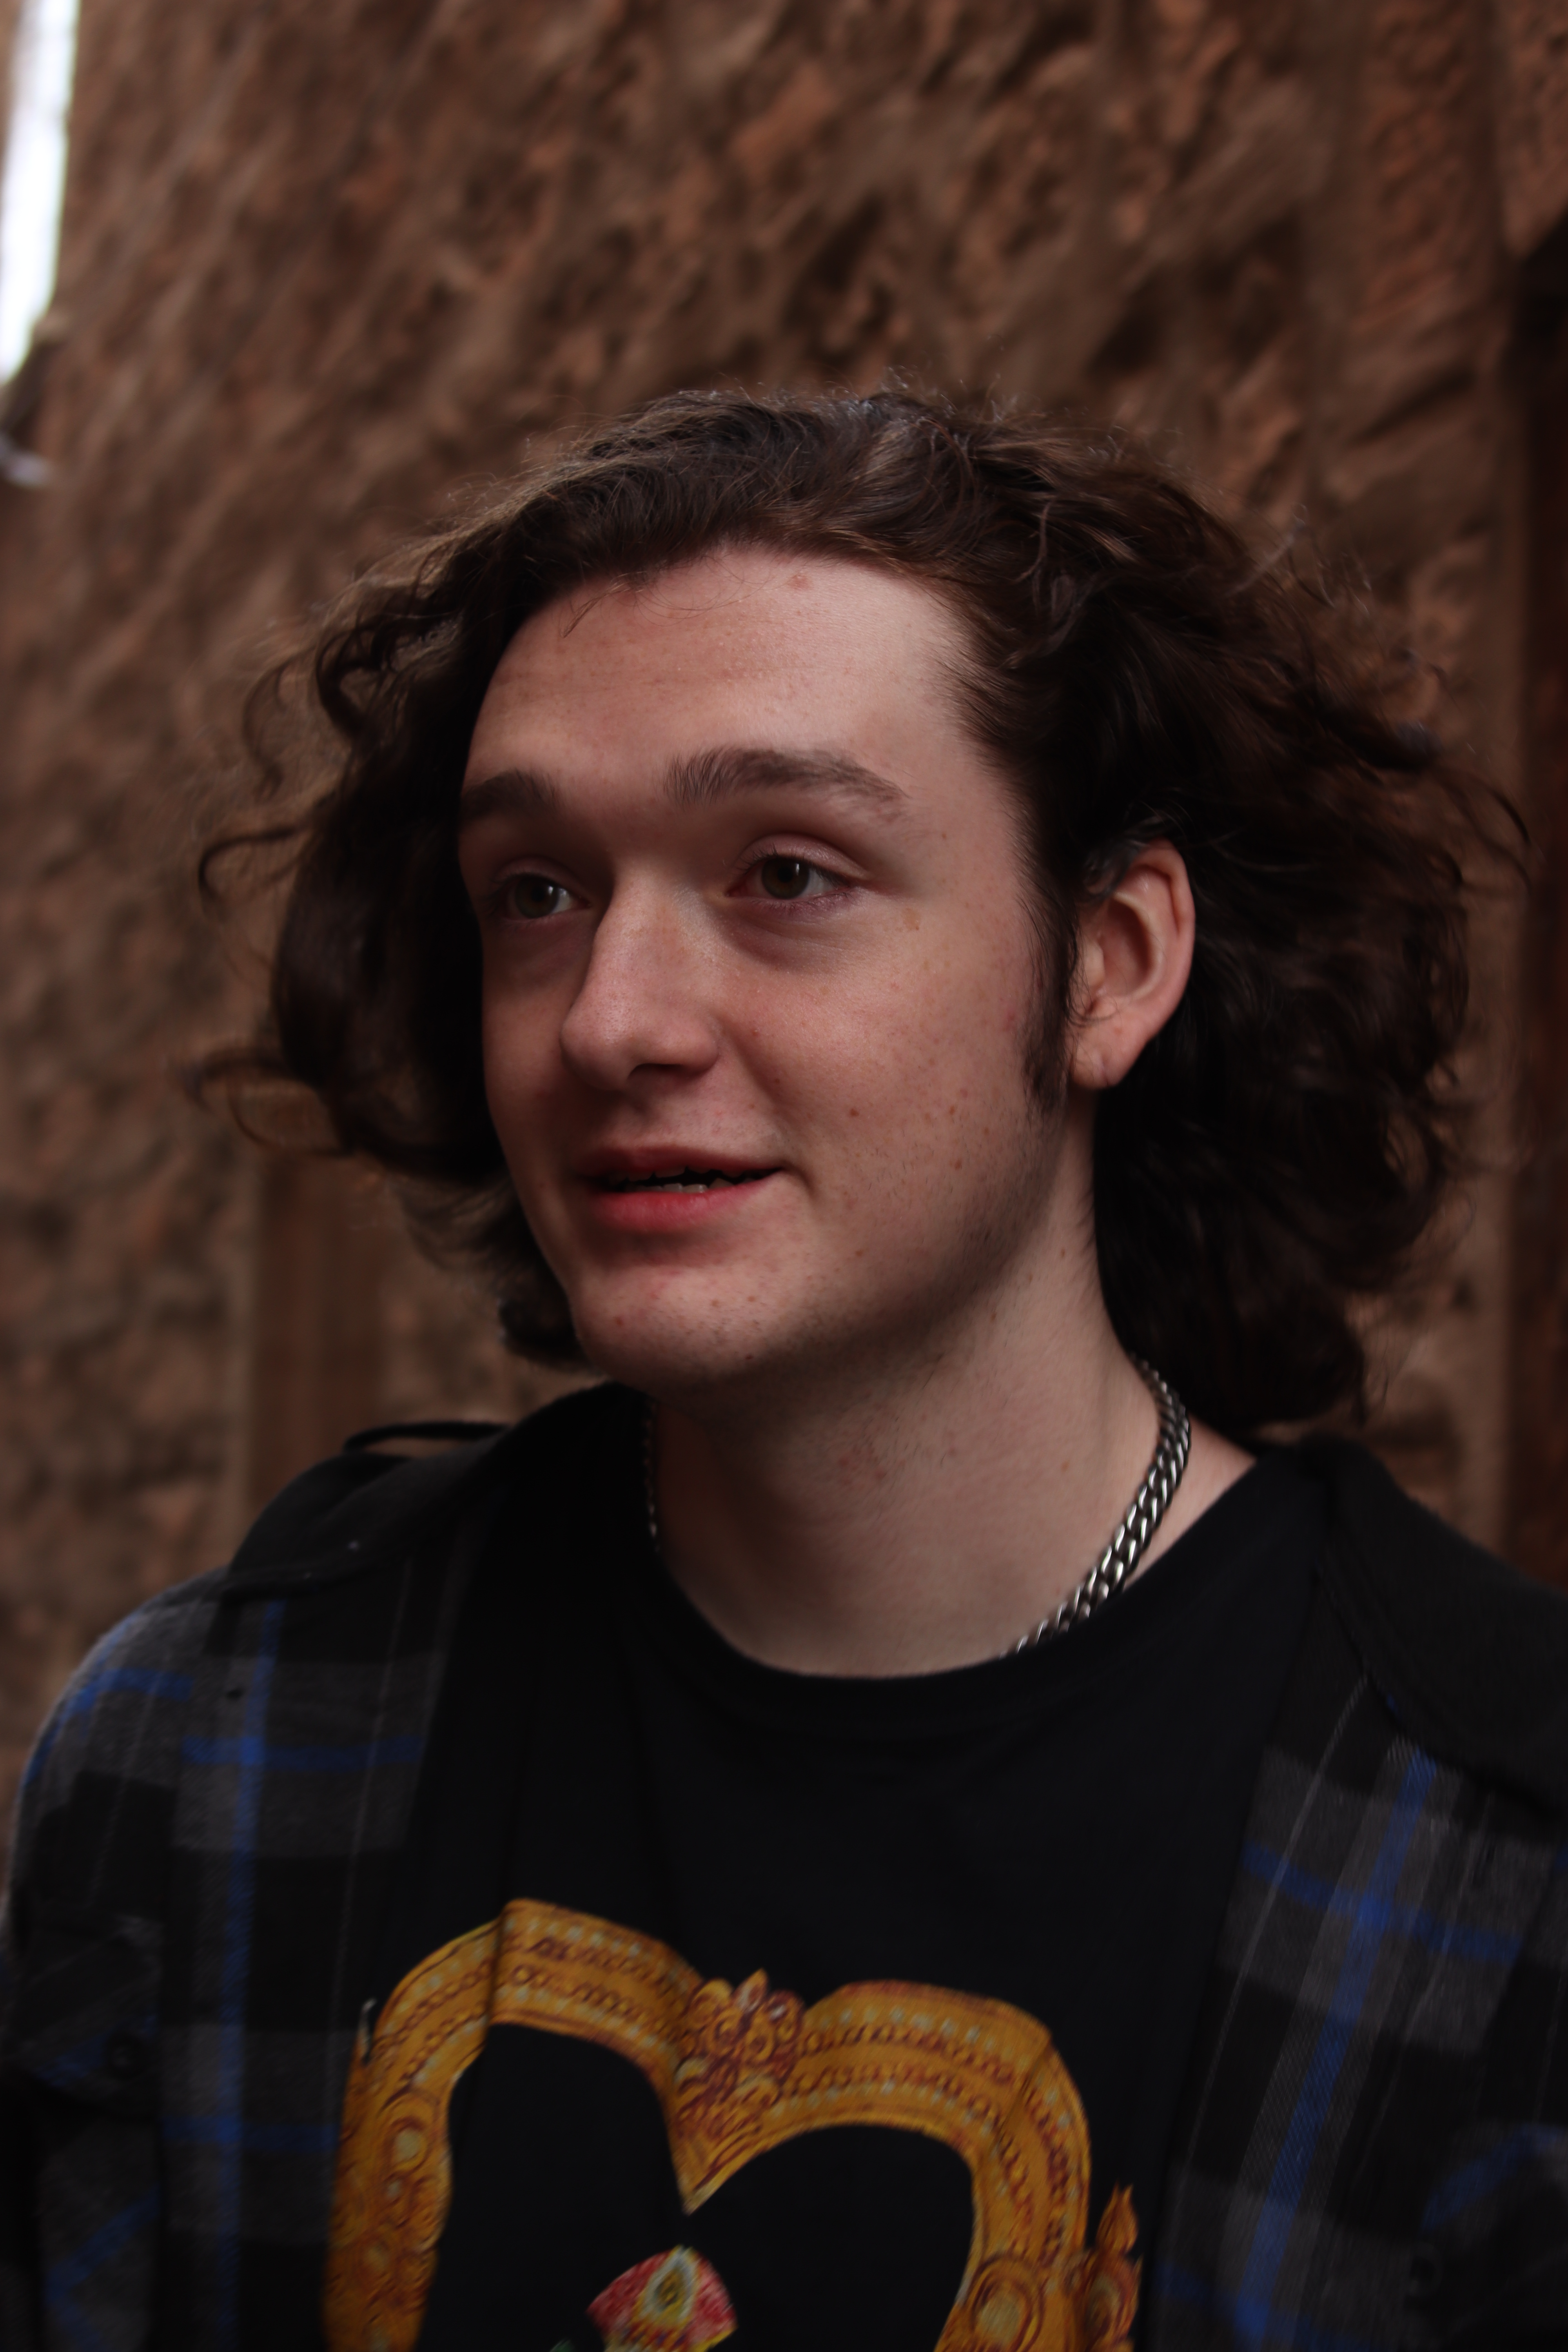
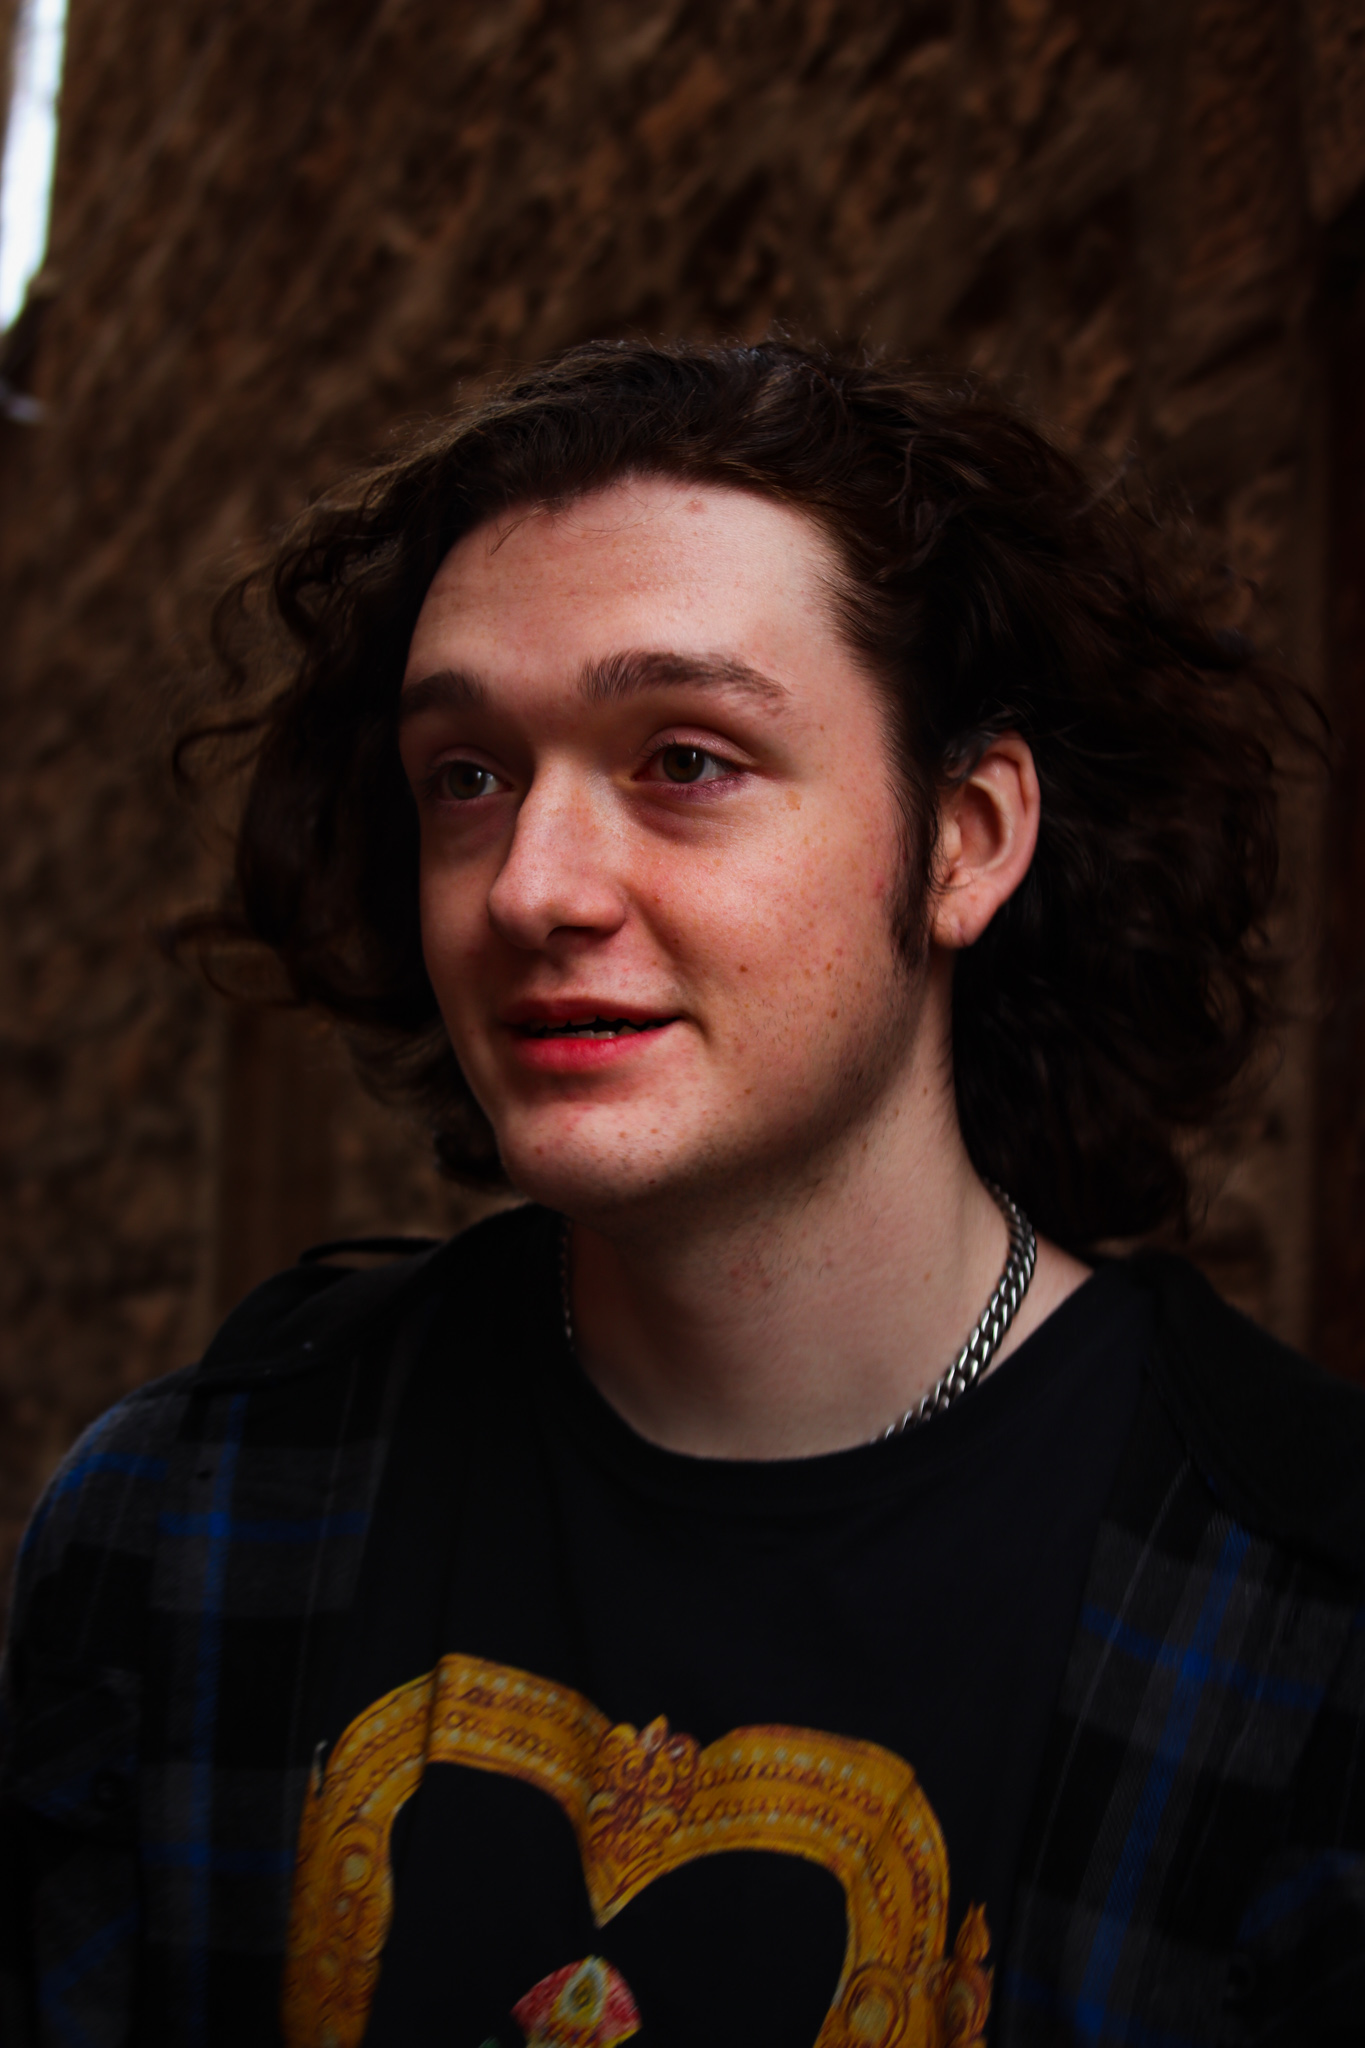
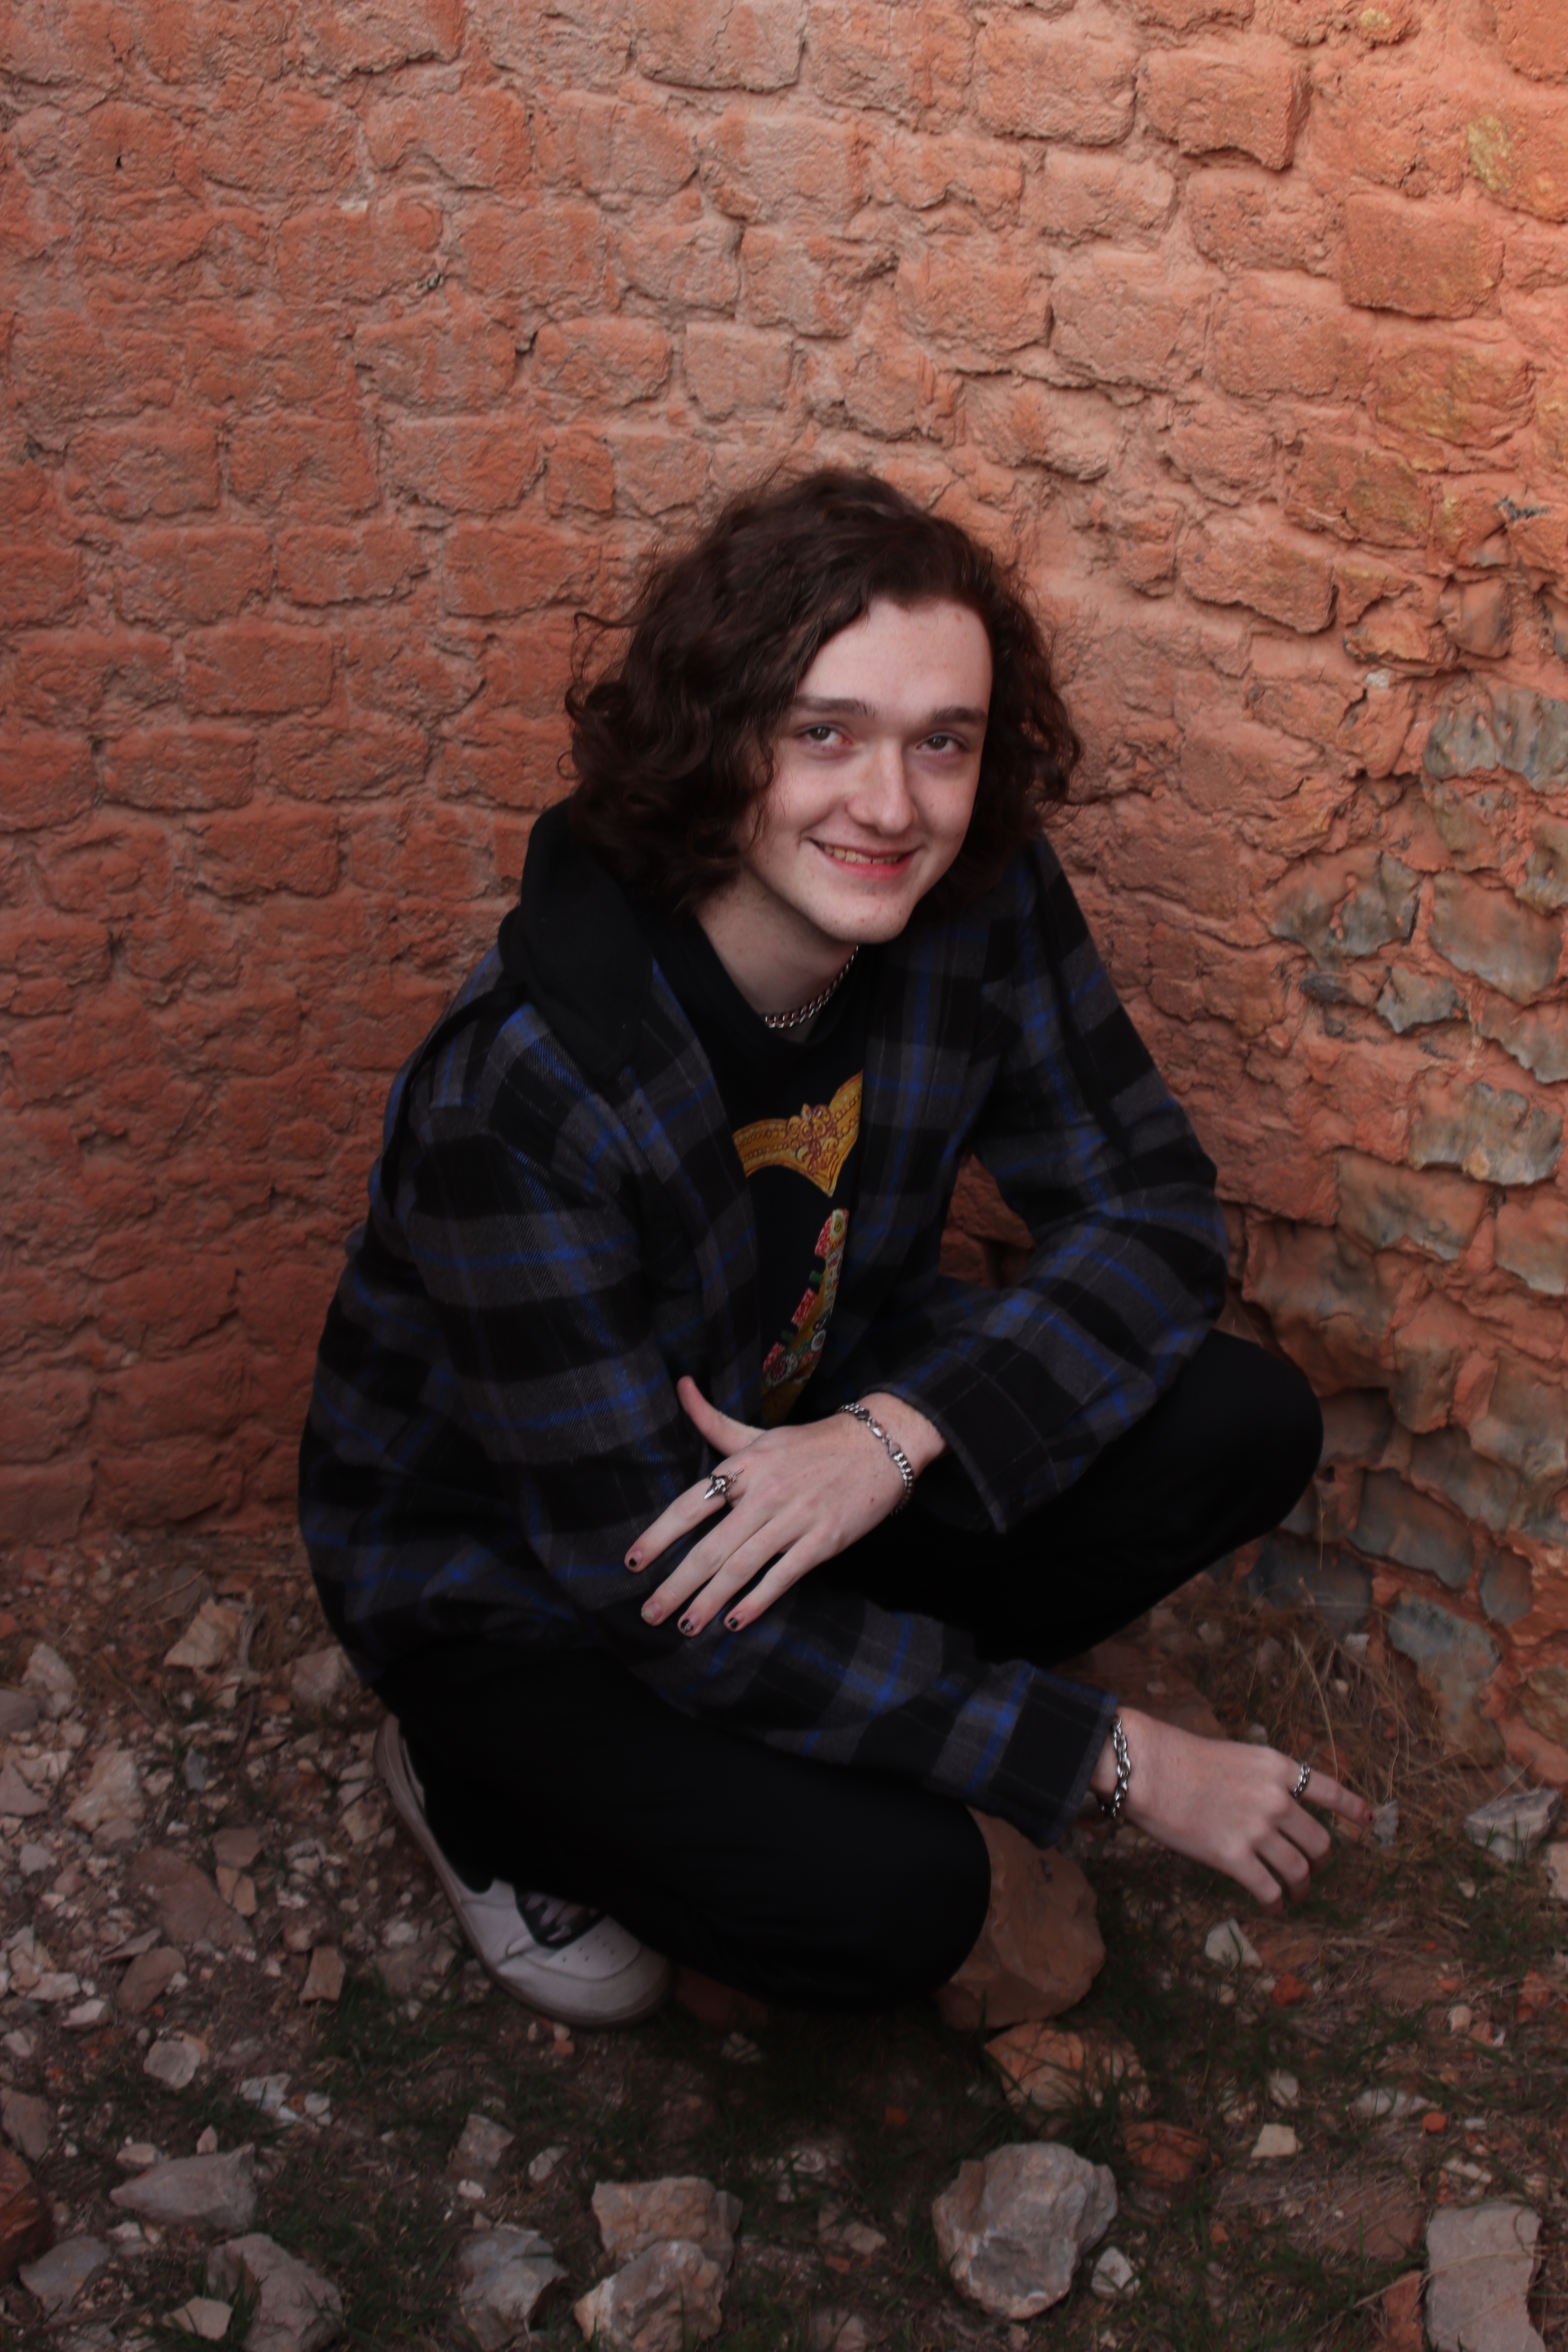
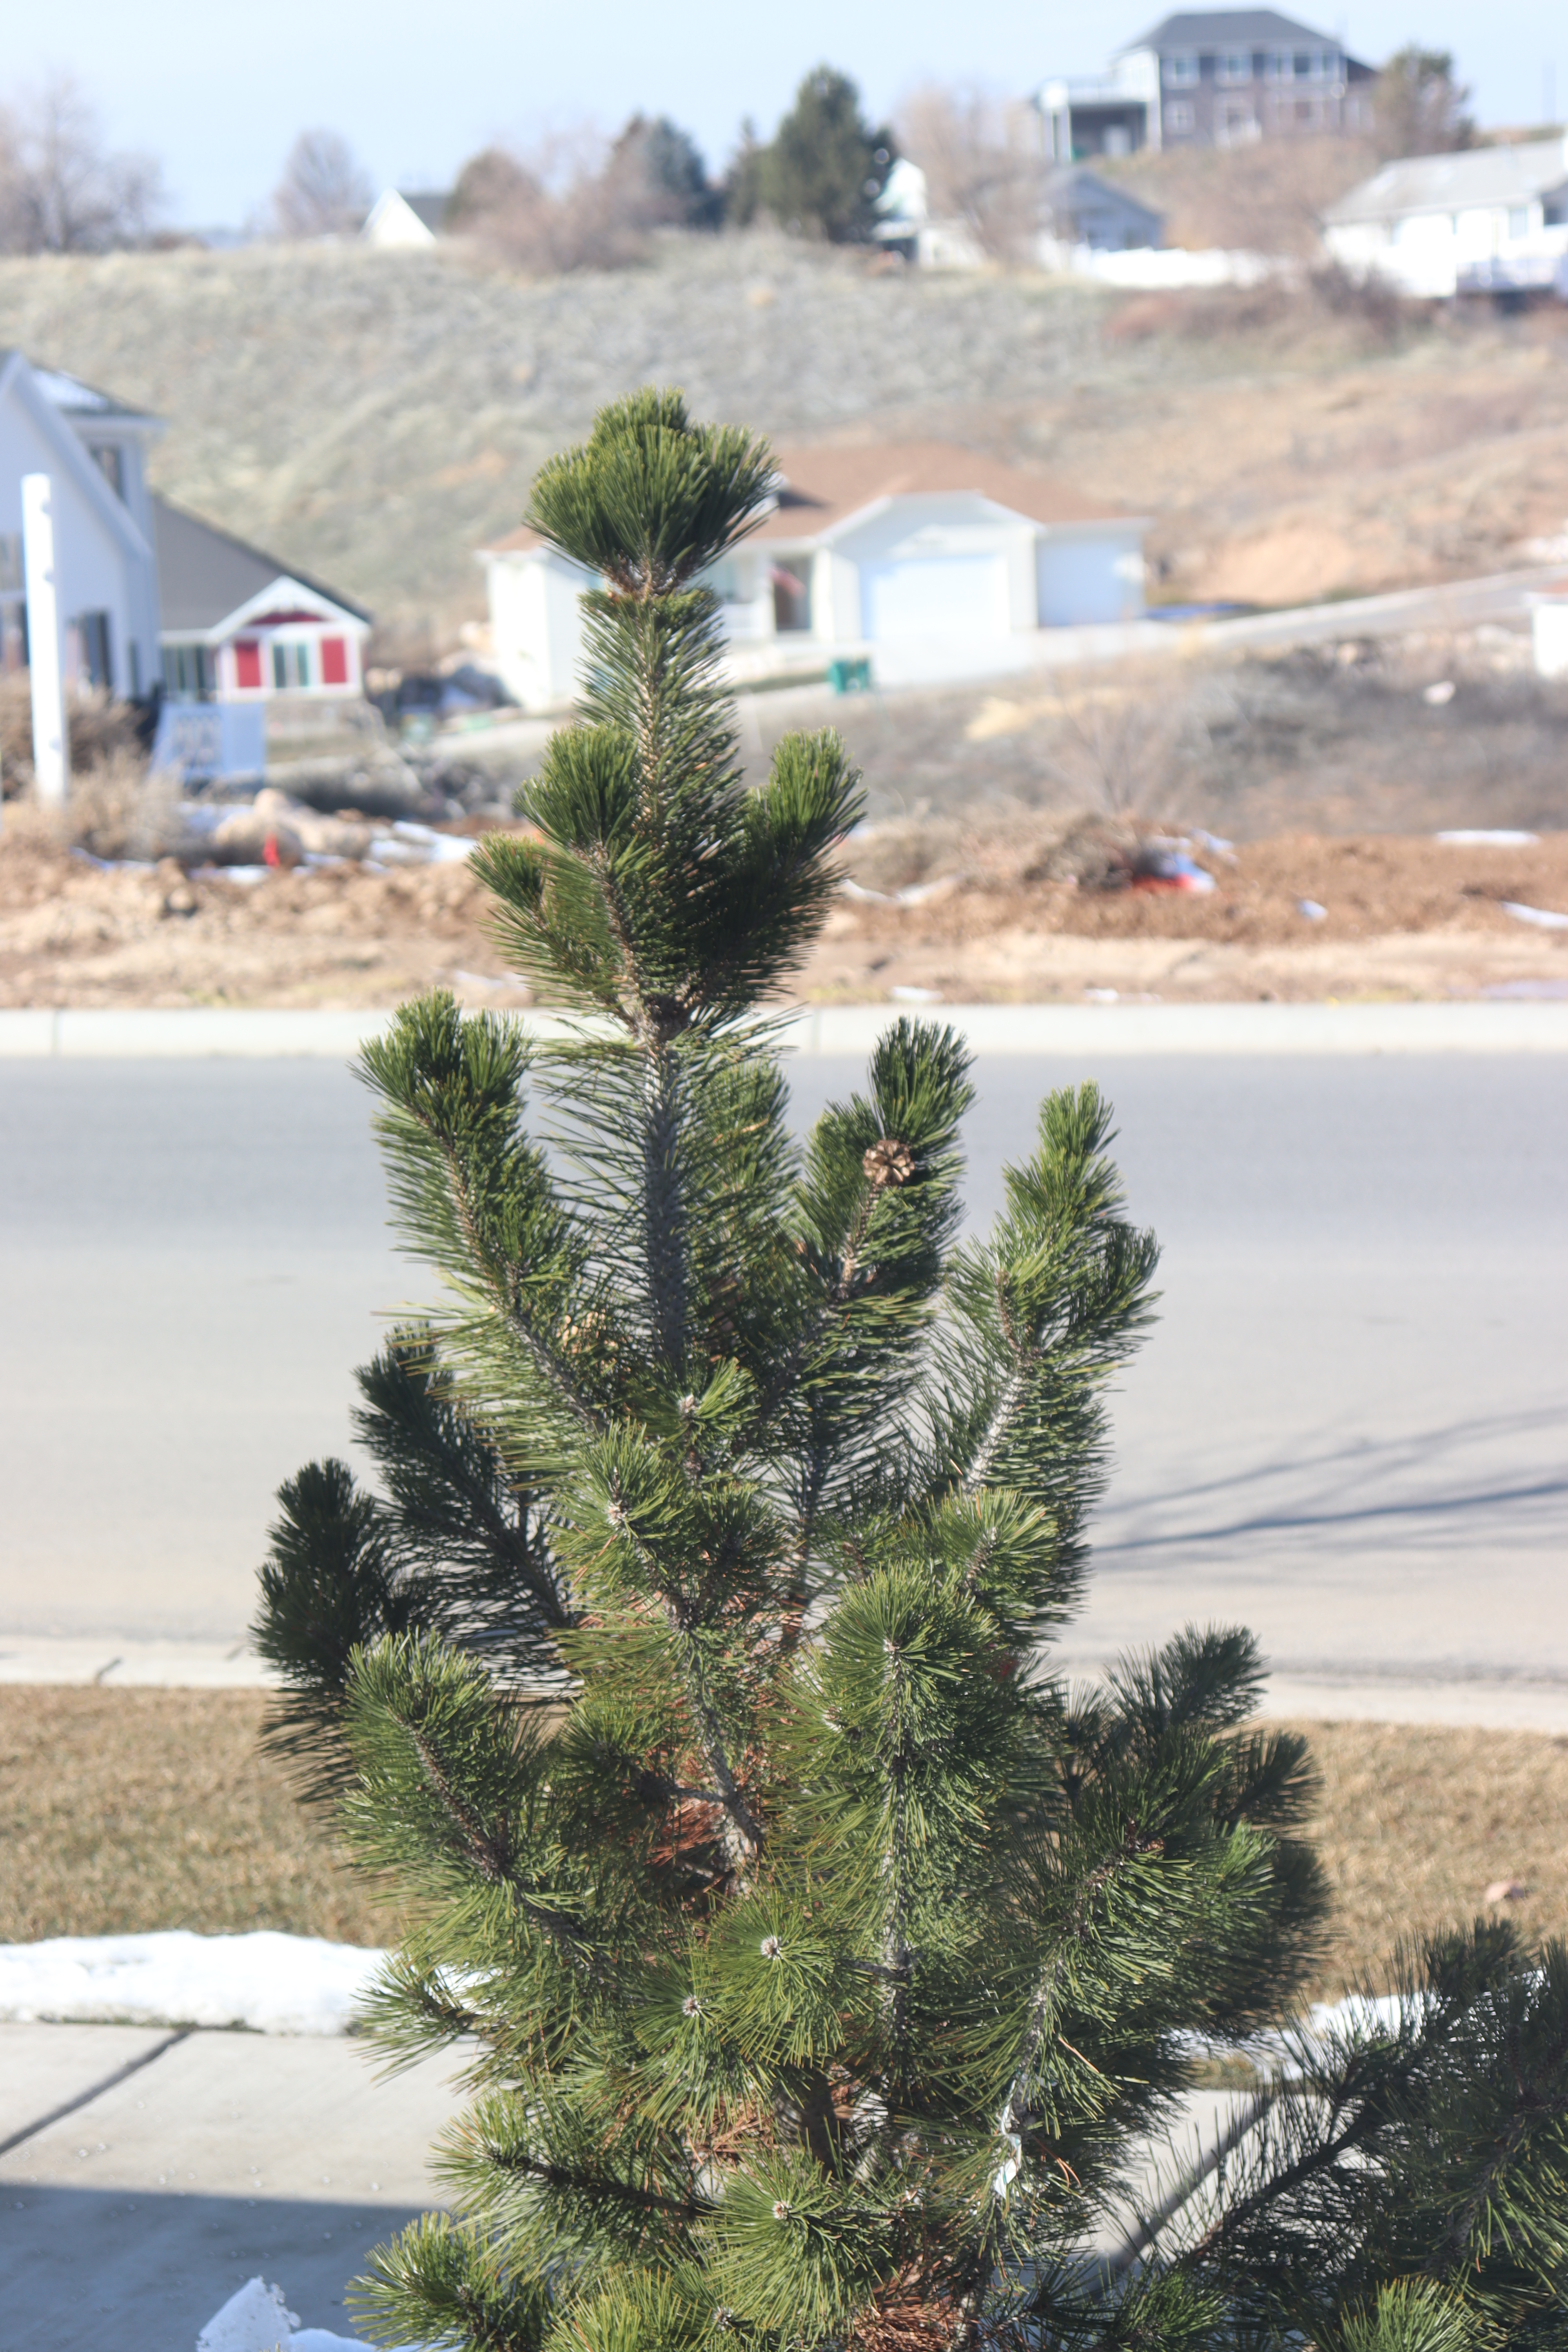
Focal length is just what it sounds like. How far away you are from your subject affects how the image presents itself in terms of what is in focus. For this, I took photos of my subject, backing up further and further with each photo and zooming in on my focal length. The focal lengths I used were 18mm, 25mm, 35mm, 50mm, 70mm, 135mm, 200mm, and 300mm. As you can see, the 70mm mark is the most accurate to the subject, and the further or closer I got from the subject, the more warped their features became. For something like portraits, typically 70mm is the best focal length, but for this and other photos, focal length can be used to further manipulate the photo to how you want it to be viewed.
There are three parts to a decently exposed photo. There is Aperture, Shutter Speed, and ISO. Each part of the exposure triangle plays into each other and contributes to the composition and exposure of every photo.
Aperture
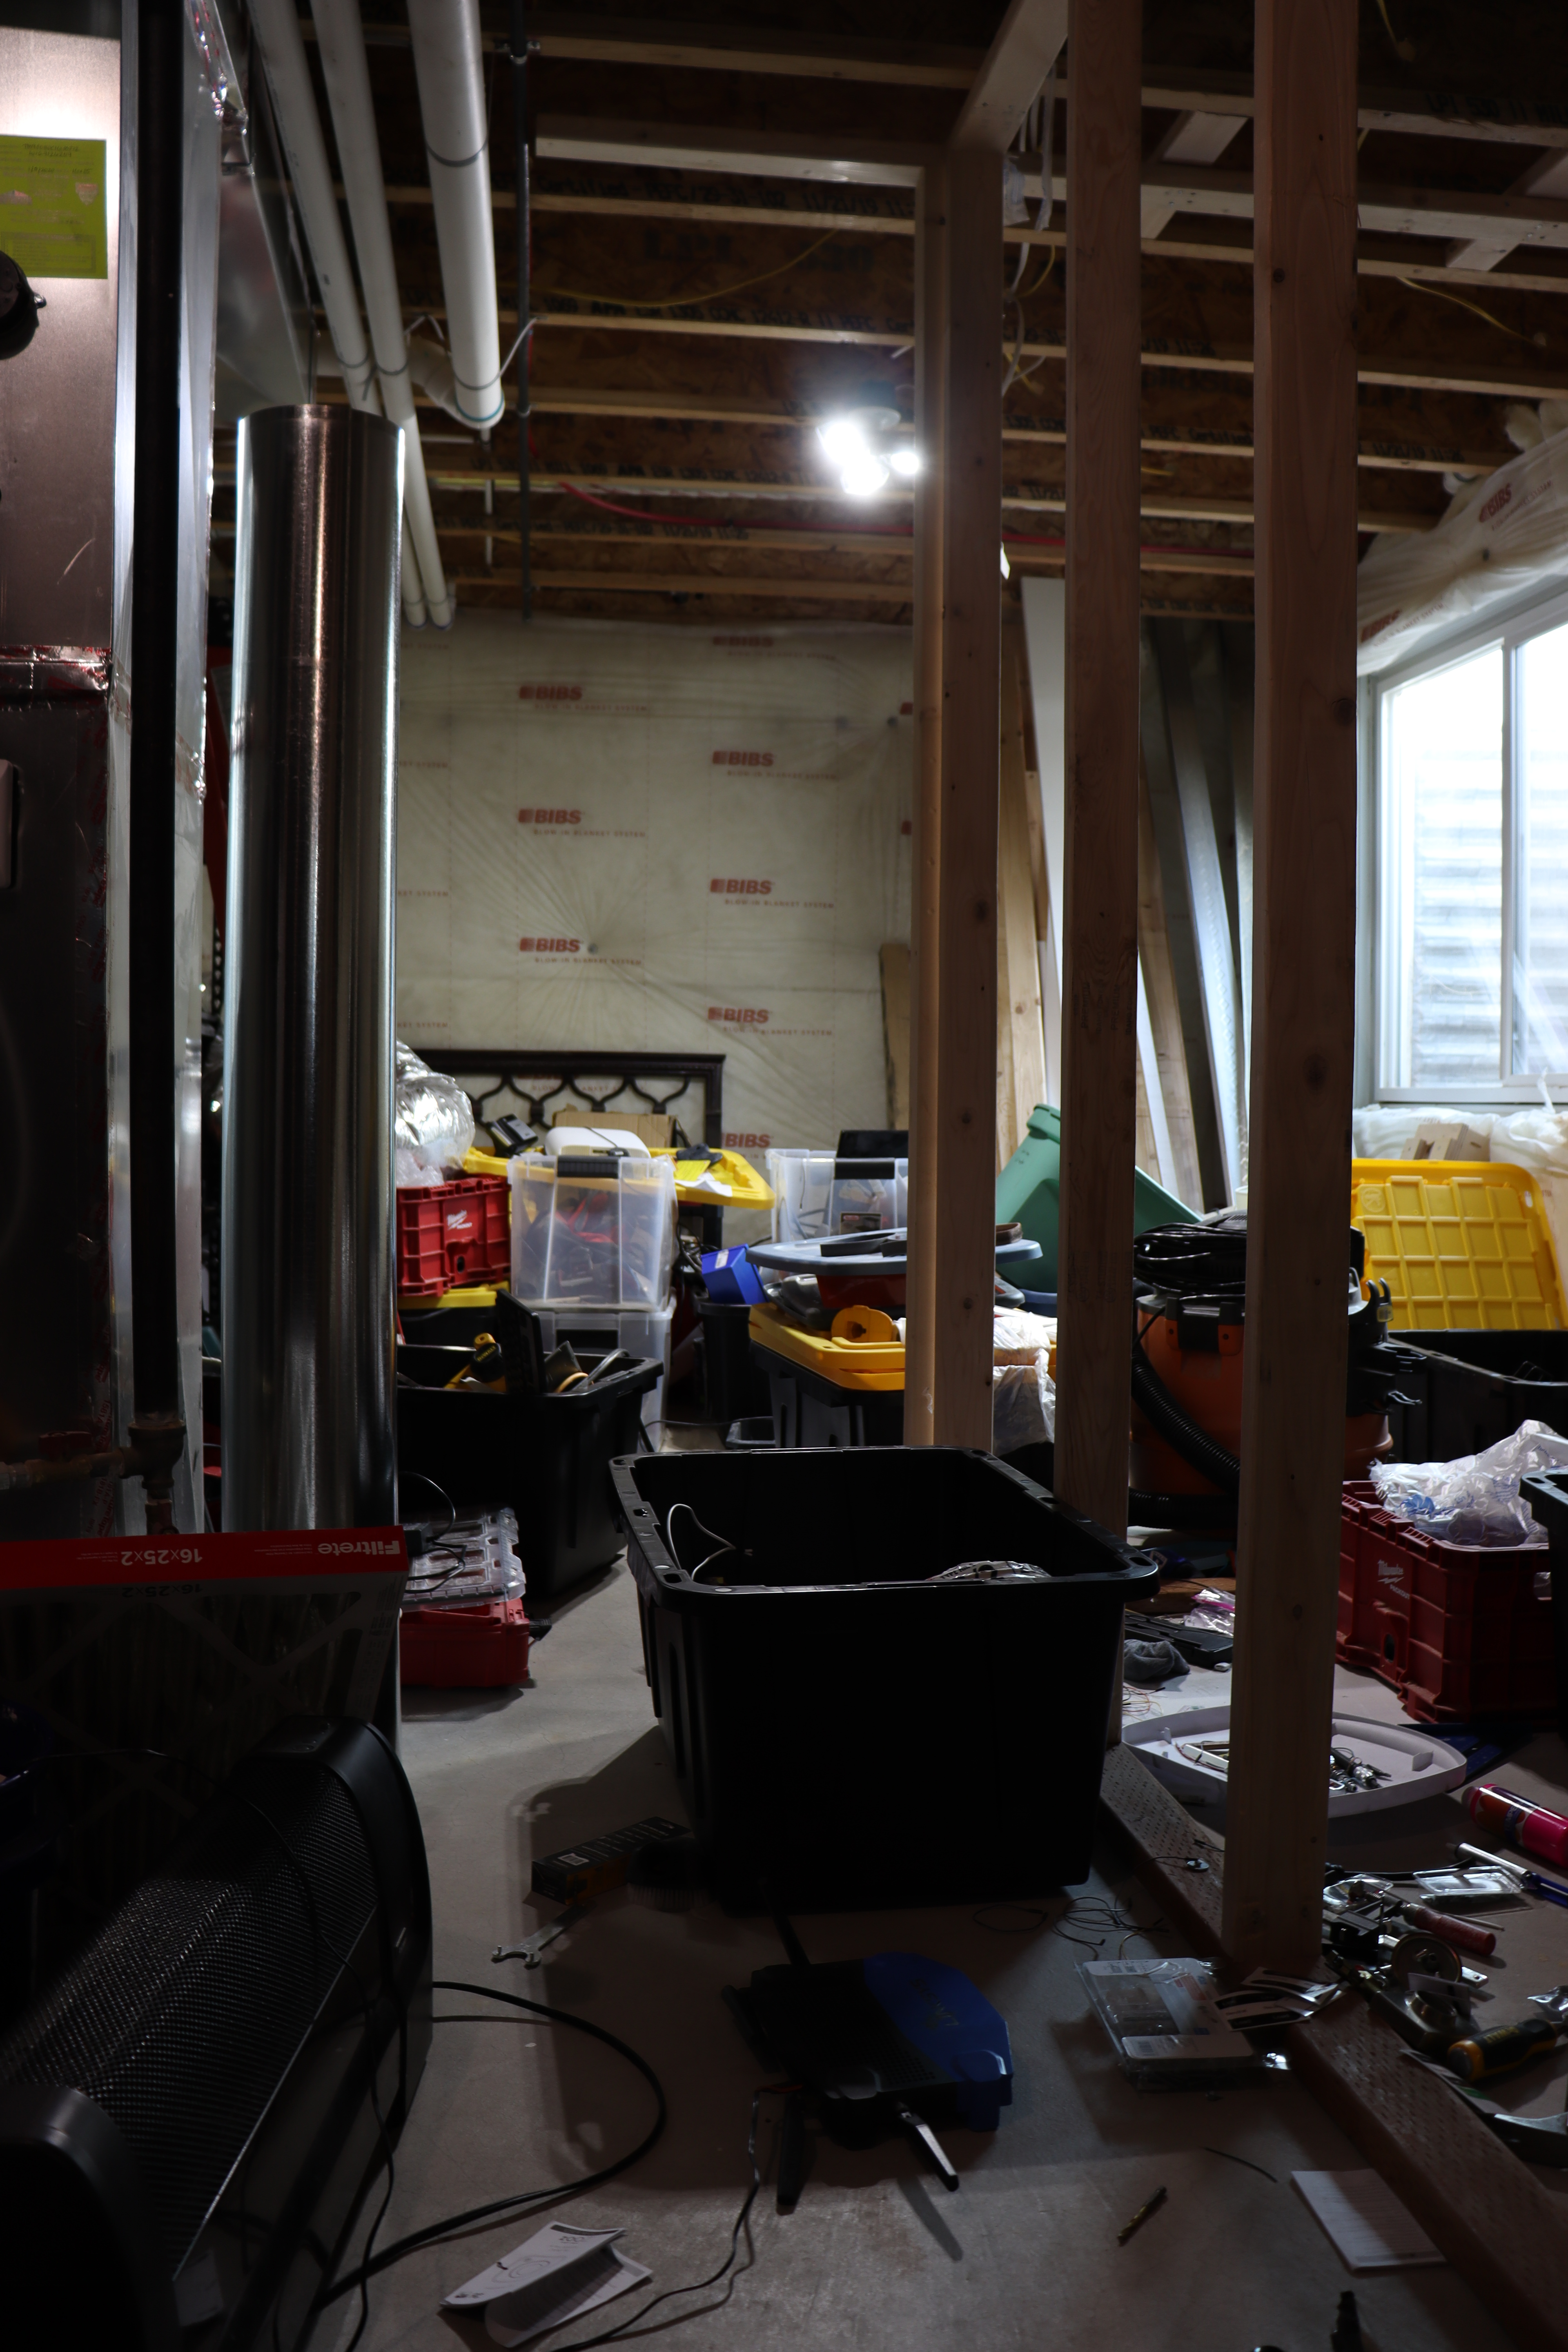
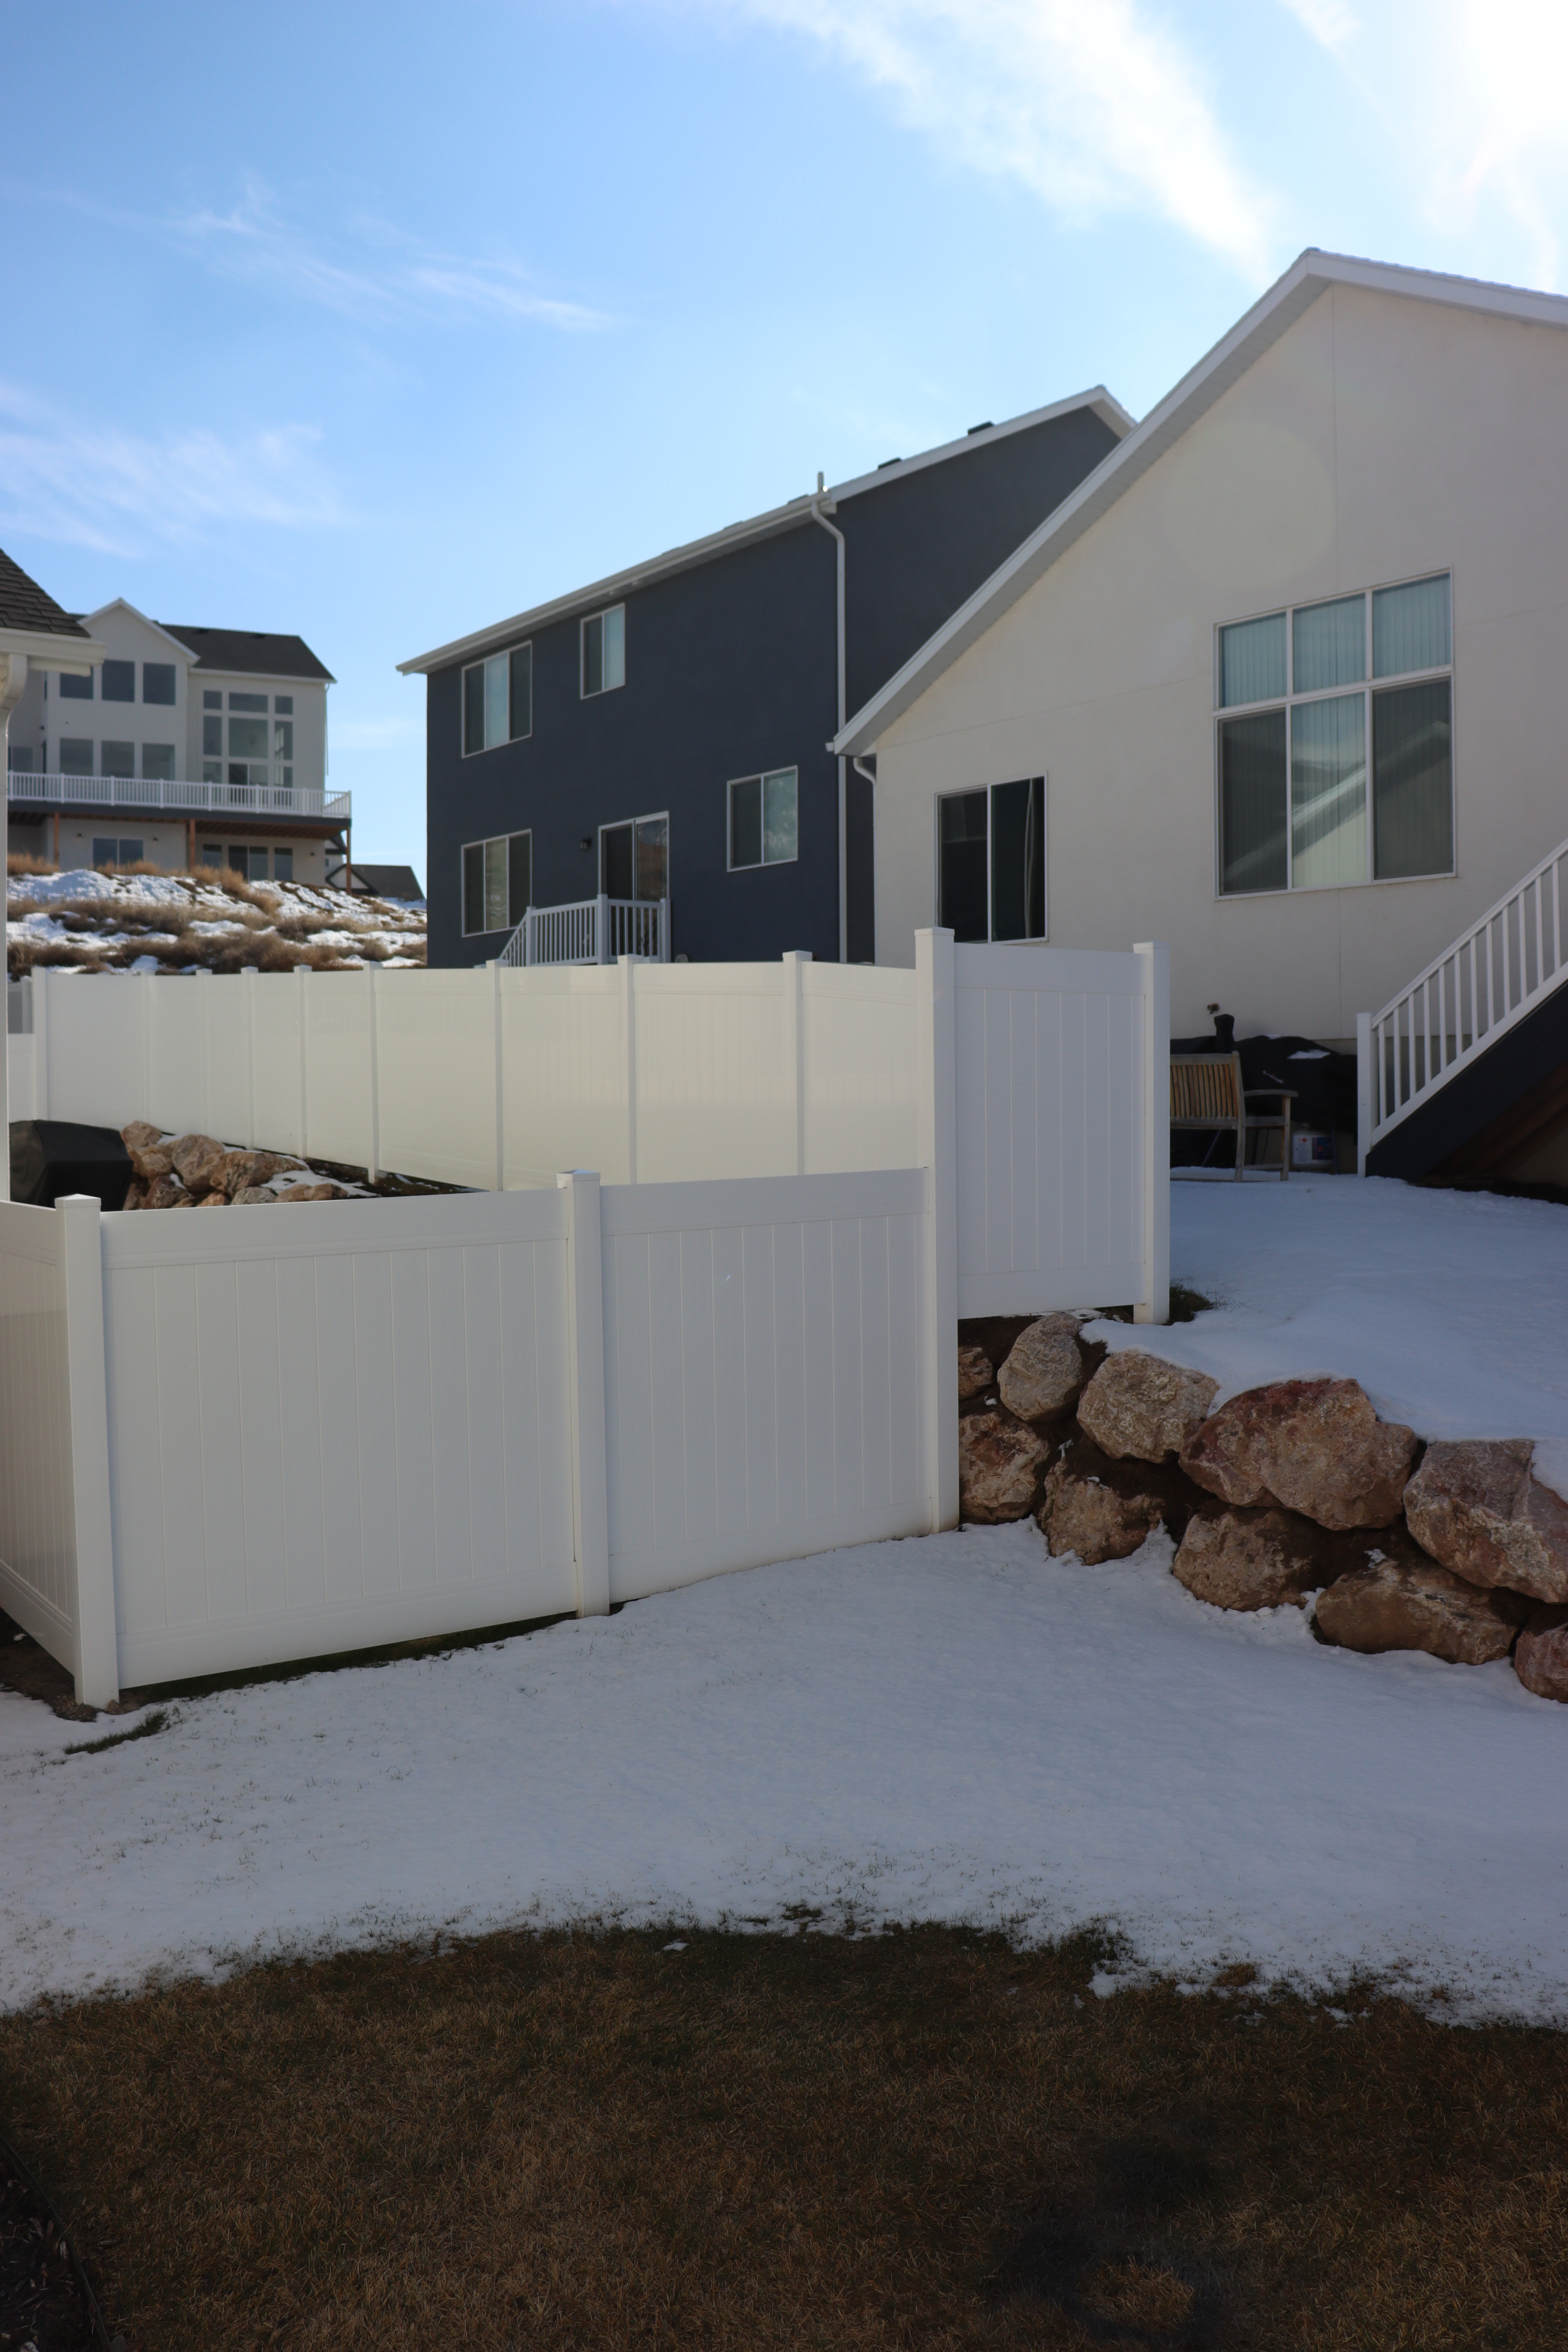
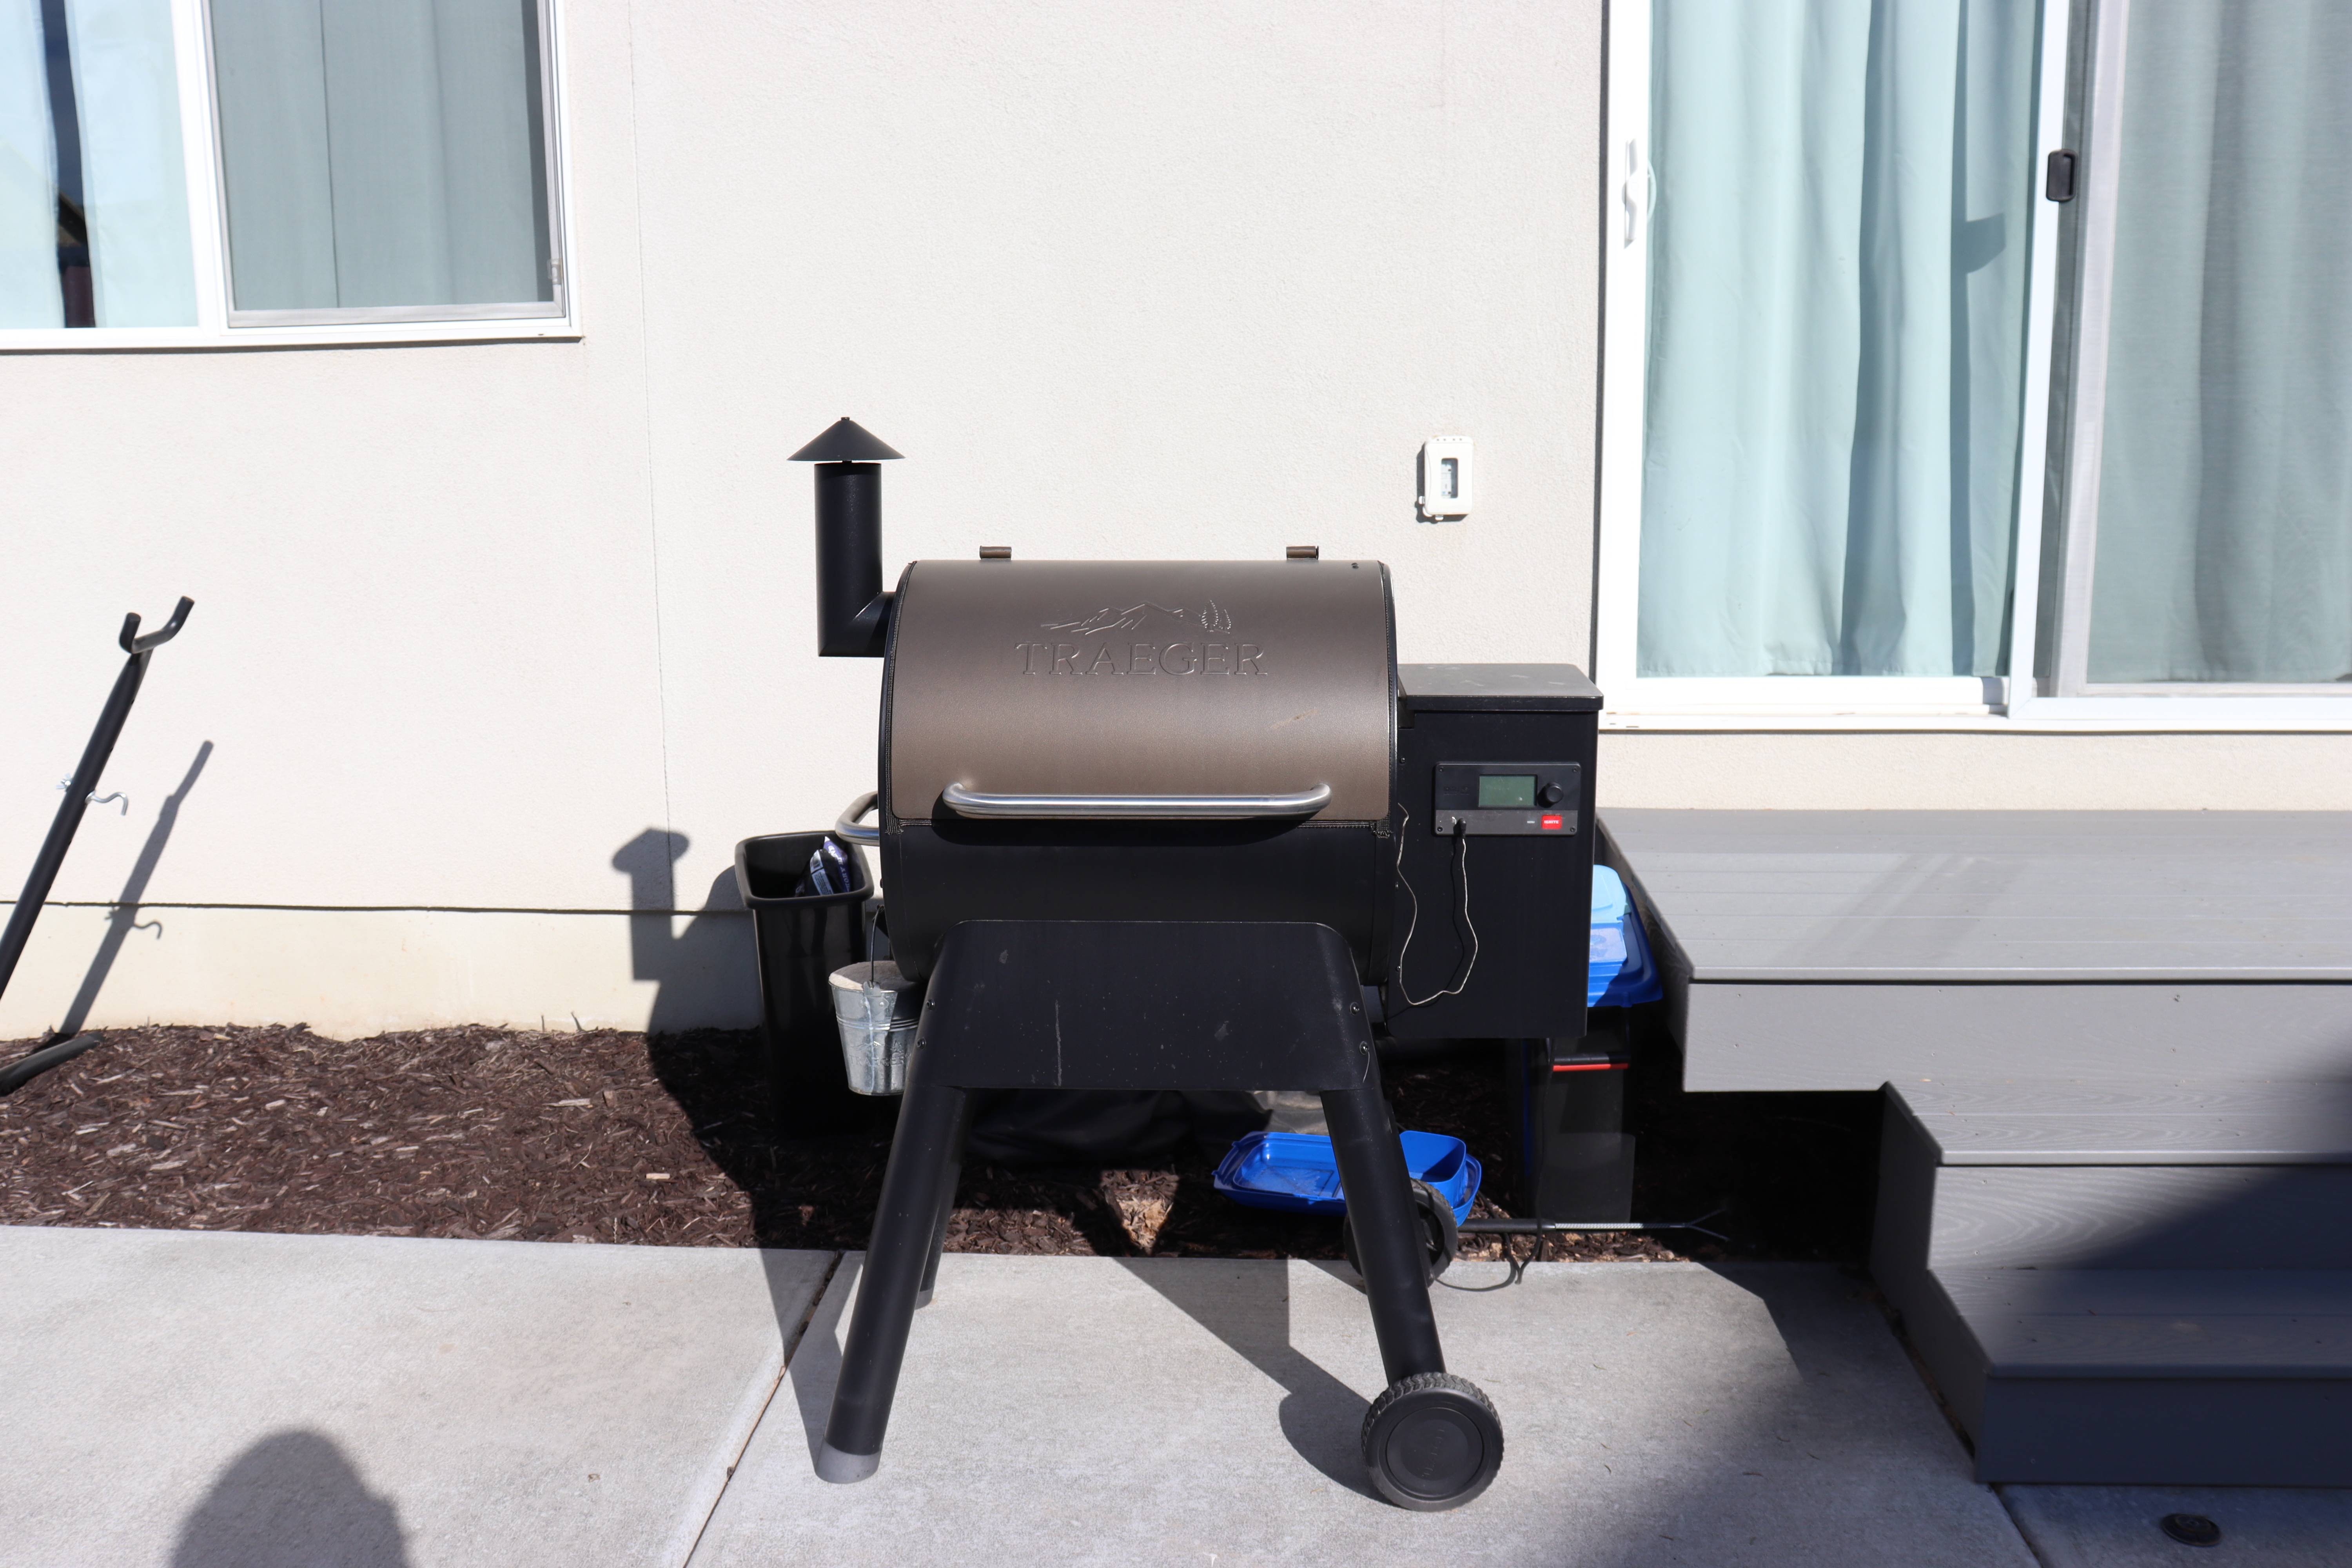
Aperture is how much light is being let into the camera via the lens. The wider the lens is open, the more light is let in. As well as that, the wider the lens is open, the less focused the background will be. In the first image, I had an aperture of 5.6, and in the second it was 22. Notice the difference? An aperture of 5.6 will blur your photo more than an aperture of 22. A wide aperture is typically best for photos where you want the focal object to be the only thing in focus, such as portraits. A narrow aperture is normally used when the entirety of the photo in the frame should be in focus, such as landscape photos.
Shutter Speed
Shutter Speed is how fast the curtain in the lens closes, or basically how fast the image is taken. Typically the slower your shutter speed, the more movement will be caught in the form of a blur. You need a shutter speed of at least f/250 for a blur motion photo, and f/500 is typically best for freeze motion when you want a moving object to appear still. The photos I have do not show this, but with the difference in lighting, I adjusted the exposure only using shutter speed.
ISO
ISO will brighten your photo at the expense of image quality. Typically you want to use this as a last resort when adjusting the aperture and shutter speed fails to expose the image. In any other circumstances you want your ISO to remain at 100, but keep in mind that the higher your ISO goes, the more “noise” will appear in your image. This noise is pixilation, which makes your image grainy and puts it at a lower quality.
Glitch photography is super fun and extremely unique. No two photos will end up the same. To achieve this effect you will need to create a copy of the original photo, so as not to corrupt the photo itself. I made a mistake this time and forgot to complete that step, so this is the original photo, and I can’t undo it if I need to, unfortunately.
Once you have created a photocopy, you will open it in the Notepad++ app (if you don’t have it make sure to download it). It is absolutely imperative that you do not mess with at least the first fourth of the data (scroll down until at least that far) or you will corrupt the file. Beyond that, however, you can basically just delete and type at random anywhere else (I copied several John Mulaney jokes into this photo in random sections). Then to view your progress, every few changes you should save your progress, then go into your files and reopen the photo into your photo viewing app.
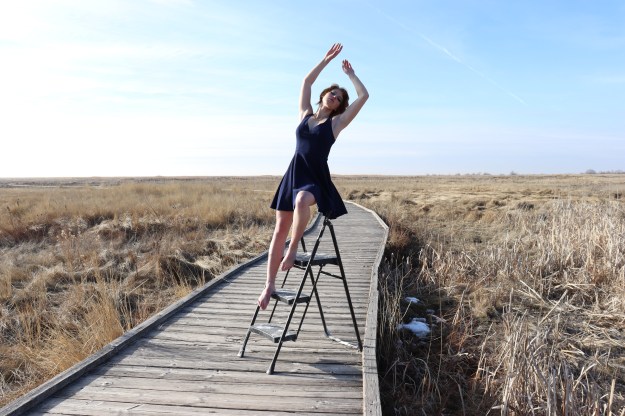
Levitation Portraits are some of my favorite types of conceptual artistry. They are quite simple and fun to make and give you plenty of room to get creative and experiment with strange color compositions, dramatic lighting, and object placement. These are the kinds of photos in which you can really get away with shifting reality in a way that most other photos won’t allow for.
Great Salt Lake Shorelands Reserve, Jan 20, 2022
Background Image
Main Object Image
To achieve this effect, you will want to start off with two basic types of photos. One of each of the objects of interest, and one of the background. The position of these photos will need to be as identical as possible, so I would recommend you have a tripod and shutter remote with you. I would also recommend these photos be done in cloudy weather, as shadows can complicate things. As you can see, my photo was done in sunny weather, but I had to go to the extra trouble of creating artificial shadows in photoshop. The object of interest needs to be resting on an object (such as the ladder in the photo above) or held by an assistant, in a way that keeps any part of the assistant from covering the object itself. When placing my model on the ladder I asked her to position herself in a manner that made it seem like she was not actually sitting on the ladder (notice the position of her feet respective to the ladder). I then adjusted her clothing to make it seem unattached to the ladder itself. While posing may be awkward for a moment, it is important to make the position of the model seem natural. I had her lean back as far as she was comfortable with, and gave her breaks from that pose as often as possible.
Editing Process
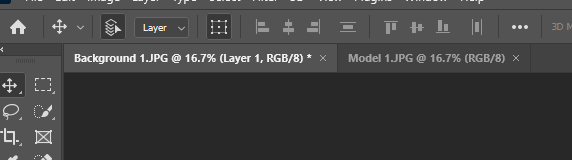
Step 1: Place the object layer over the background layer (you can do this by dragging the model photo to the tabs at the top of the Photoshop window using the Move Tool, then releasing it over the background photo).
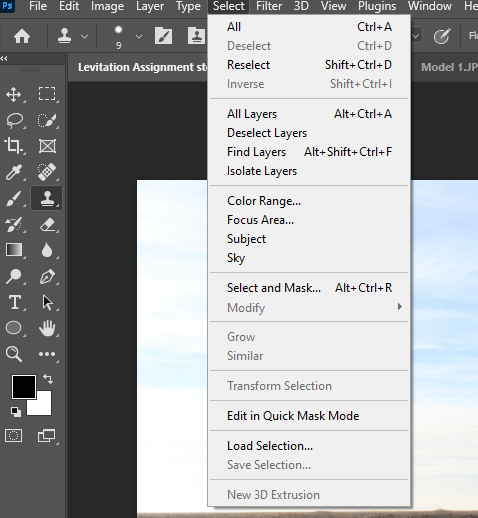
Step 2: Make sure the object layer is selected. Then go to the top of the window and choose Select -> Subject. This will cause a selection to appear over the object.
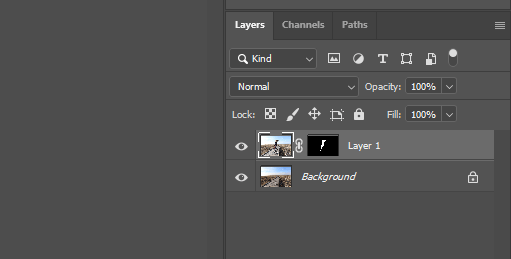
Step 3: Create a Layer Mask. The background should disappear. Use a Soft Brush tool to fix any edges or remove any background that wasn’t removed.
Repeat this process for any other objects you want to add to your levitation.
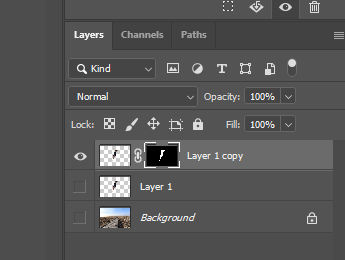
Step 4: You will begin to add shadows if needed. This step is optional, and if you took your photos in a cloudy environment, you shouldn’t need to do this. Steps 4-10 will cover this, so if you don’t need this part of the tutorial, skip to Step 11. To do this, choose your Object Layer, then right-click on the layer mask and select Apply Layer Mask. This will merge the mask to the layer itself. Copy the layer, then select the layer copy. Make it so only the selected layer is visible.
Step 5: Once again go to Select -> Subject like in Step 2. Apply another layer mask. Use the Brush Tool to fix the edges if needed.
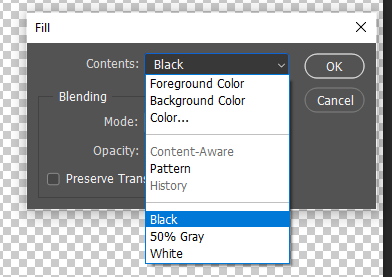
Step 6: Make sure the visible layer is selected, and not the layer mask. Select Edit -> Fill -> Contents -> Black. Click Ok. The object in question should turn into a black silhouette. If something other than that happens, make sure you have selected everything correctly. Once you have successfully done this, apply the Layer Mask once more. Make all other layers visible again.
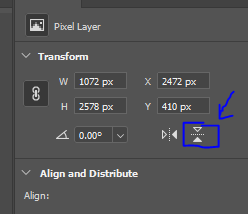
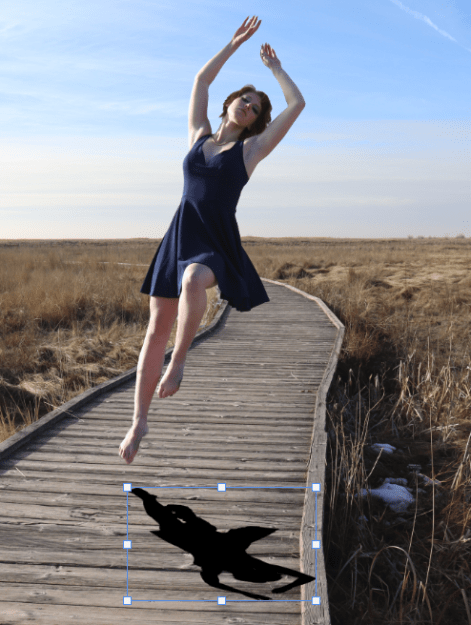
Step 7: With the Shadow Layer selected, click the Vertical Flip option in your Transform Window. If the lighting and positioning of the object and shadow really call for it, it wouldn’t hurt to use Horizontal Flip as well.
Step 8: Using the Move Tool, Ctrl+Click and drag the bottom axis of the silhouette until it is relatively shorter (or longer) than the object itself. During this point, be sure to keep the rules of lighting and shadows in mind, or it will become disproportionate. If it helps you can drag the shadow to the area you plan to put it before you adjust the size. Once you have done that, you can rotate and move the shadow to about the angle and position you want it in. Whether or not it goes out of frame doesn’t matter, as long as it follows the light pattern.
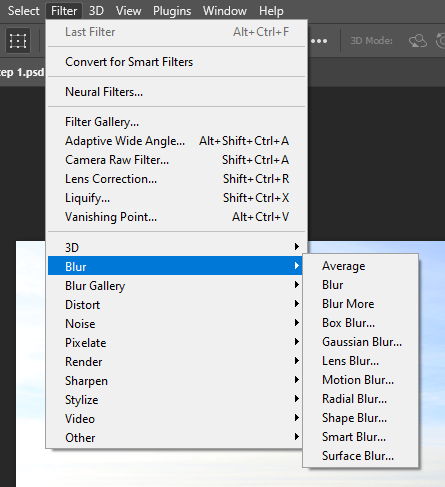
Step 9: With the Shadow Layer selected, go to Filter -> Blur -> Gaussian Blur.
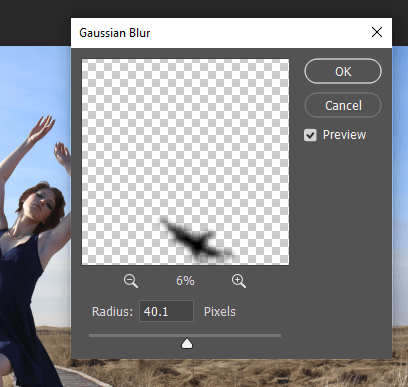
You can mess with the blur however you want, but keep in mind that the slider is sensitive, and it won’t show you the look until you let go of the slider. You want it to be as blurry as possible while still keeping the silhouette. For this shadow, I went with a range of 30-45.
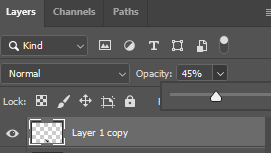
Step 10: Go to the Layer Opacity and lower the opacity. You will want less than half of the opacity under the majority of circumstances. Keep in mind that the harsher the sun in your photo is, the sharper and more prominent the shadow will be. For this, I went with 45%.
Adjust the shadow once more as needed. Repeat steps 4-10 for any other objects. Depending on the lighting and object placement, not everything in your photo may need a shadow.
Step 11: Now that you have successfully created a levitation effect in your photo, you can edit the photo itself as you please. These next steps are also optional. With these kinds of photos, it is a lot of fun to experiment with radical colors, dramatic lighting, contrast, and all other forms of composition. Personally, I prefer to use the Camera Raw Filter to do this. However, the filter will only edit the layer selected, rather than the whole photo like an Adjustment Layer would.
To fix this issue, create a copy of every layer in your photo by selecting the layer and clicking Ctrl+J. Make it so that only the copied layers are visible.
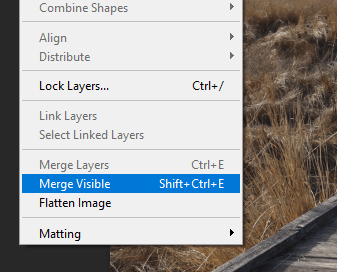
Select Layer -> Merge Visible, or type Shift+Ctrl+E. This will merge those copied layers.
Make sure the new layer is at the top of your layer selection order. Use the newly merged layer for your filter. If you don’t want to go through the trouble, you can always just use adjustment layers and filters.
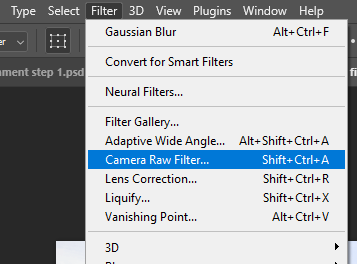
Step 12: With your merged layer selected, go to Filter -> Camera Raw Filter, or type Shift+Ctrl+A. This will take you to a properties window with a full range of adjustments.
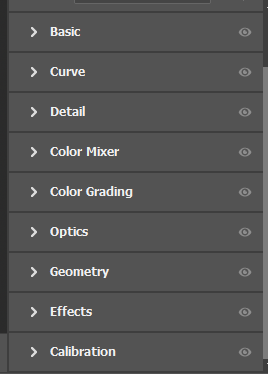
From there on, you can go ham. Something I would recommend in any photo is adding a vignette to the photo, even if it’s so faint that it seemingly doesn’t make a difference. If you toggle the before and after effects, you will see that it does. You can find the vignetting options in the Camera Raw Filter in the Optics and the Effects categories.
There are some other edits I chose to make, which I also recommend you experiment with. I added dramatic lighting/contrast, which you can do in the Basic category, along with many other basic exposure-based effects. I experimented with color composition, bringing out the red colors enough to stand out. You can do this in the Curve, Color Mixer, Color Grading, and Calibration categories, but I prefer to use Color Grading and Calibration. I adjusted the temperature and tint, giving the photo more of a cold blue hue. You can also adjust this in Basic. I did a lot of other edits as well, but I recommend that you take the time to experiment with every option and find what you like.
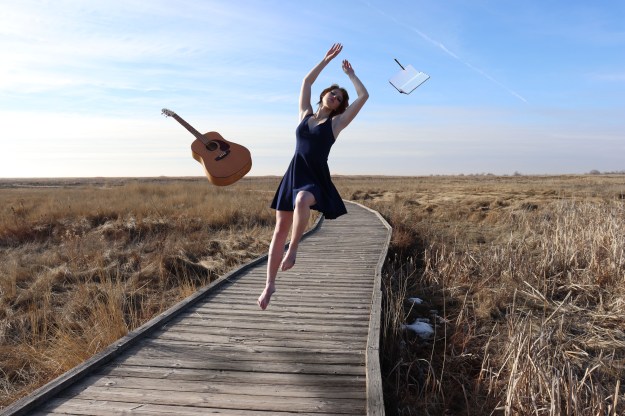
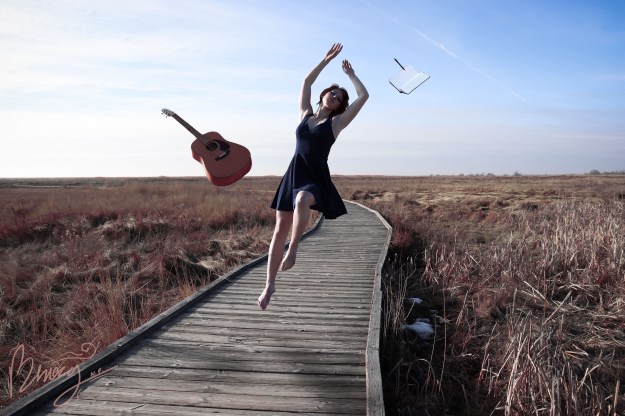
And then you’re done! Congratulations, you have successfully created an artistic levitation portrait!
Final Result
If you would like a more basic description in PDF form, here is the link: